Last updated : Aug 26,2019
Overview
Technical debt is the set of problems in a development effort that make forward progress on customer value inefficient. Technical debt saps productivity by making code hard to understand, fragile, time-consuming to change, difficult to validate, and creates unplanned work that blocks progress. Unless they are managed, technical debt can accumulate and hurt the overall quality of the software and the productivity of the development team in the long term
SonarQube an open source platform for continuous inspection of code quality to perform automatic reviews with static analysis of code to:
- Detect Bugs
- Code Smells
- Security Vulnerabilities
- Centralize Quality
What’s covered in this lab
In this lab, you will learn how to setup SonarQube on Azure and to integrate Visual Studio Team Services
- Provision SonarQube server from an Azure template
- Setup SonarQube project
- Setup a VSTS project and CI build to integrate with SonarQube
- Analyze SonarQube reports
Prerequisites for the lab
-
Microsoft Azure Account: You will need a valid and active Azure account for the Azure labs. If you do not have one, you can sign up for a free trial
-
If you are an active Visual Studio Subscriber, you are entitled for a $50-$150 credit per month. You can refer to this link to find out more information about this including how to activate and start using your monthly Azure credit.
-
If you are not a Visual Studio Subscriber, you can sign up for the FREE Visual Studio Dev Essentials program to create a Azure free account (includes 1 year of free services, $200 for 1st month).
-
-
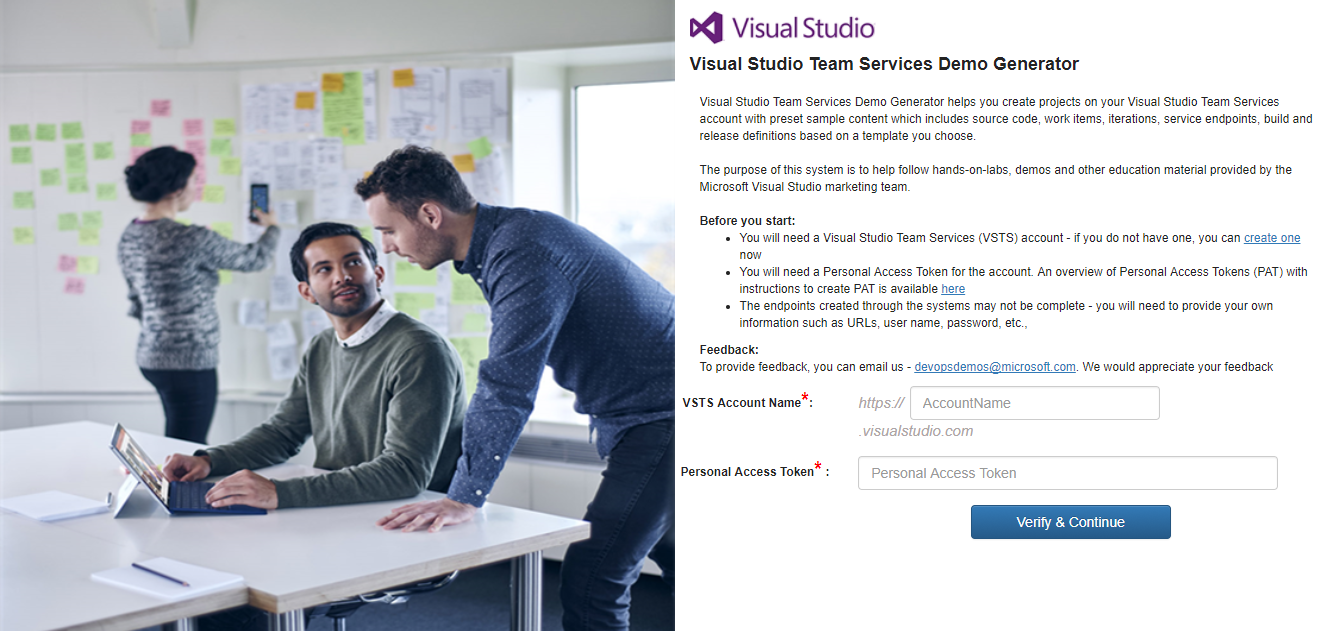
You will need a Visual Studio Team Services Account. If you do not have one, you can sign up for free here
-
You will need a Personal Access Token to set up your project using the VSTS Demo Generator. Please see this article for instructions to create your token.
Note: You should treat Personal Access Tokens like passwords. It is recommended that you save them somewhere safe so that you can re-use them for future requests.
Setting up the Environment
-
Click the Deploy To Azure button below to provision SonarQube Server on Azure VM.

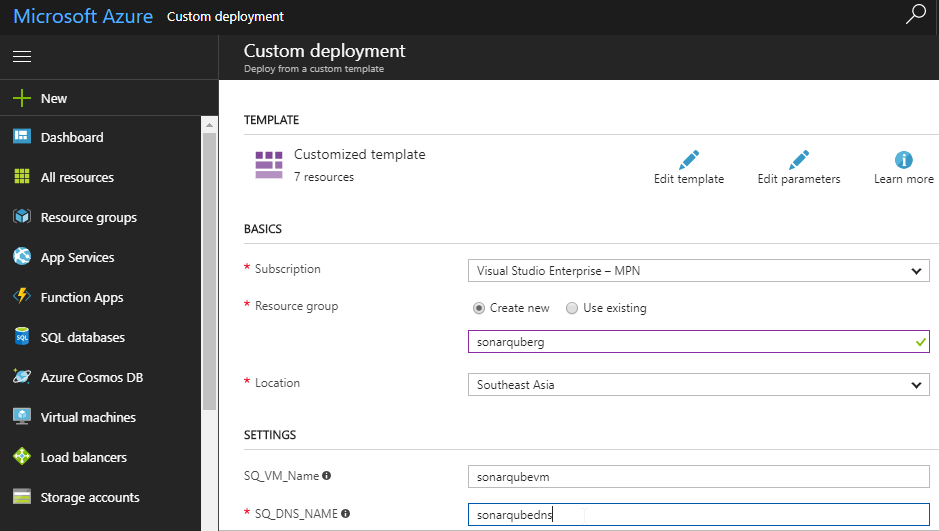
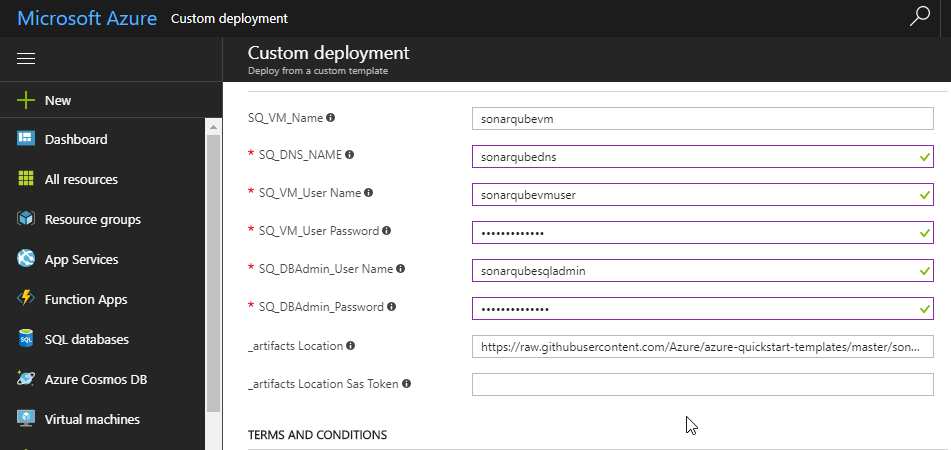
Provide the following parameters as shown.
Parameter Name Description Subscription Details Choose the active Azure subscription, create a new resource group along with the location of creation SQ_VM_Name name of the VM where SonarQube will be installed SQ_DNS_NAME unique dns name to be provided with the following pattern:- ^[a-z][a-z0-9-]{1,61}[a-z0-9]$ or it will throw an error. For ex: sonarqubedns SQ_VM_UserName local admin account for the SonarQube VM SQ_VM_UserPassword password for the SonarQube VM SQ_DBAdmin_UserName admin account for Azure SQL Server SQ_DBAdmin_Password password for Azure SQL Server _artifacts Location This value will be automatically generated. Leave the field as it is _artifacts Location Sas Token The Sas Token will be automatically generated. Leave the field as it is -
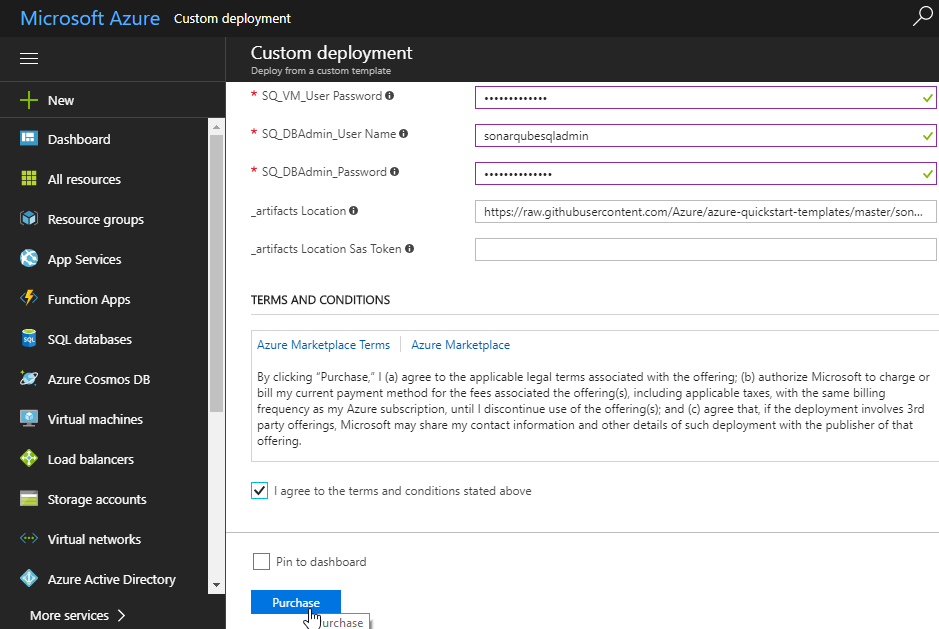
After providing all of the required values in the above table, check the Terms & Conditions checkbox and click on the Purchase button.
 Important: The deployment in Azure can take up to 30 minutes. At the end of the deployment, SonarQube will be configured to run as a Windows Service on the SonarQube VM. When the SonarQube service starts for the first time, it will configure its database. This can take an additional 15 minutes to complete during which time the Azure deployment shows as completed but you still won’t be able to reach the SonarQube home page. Please give SonarQube some time to update. Click here for more information.
 -
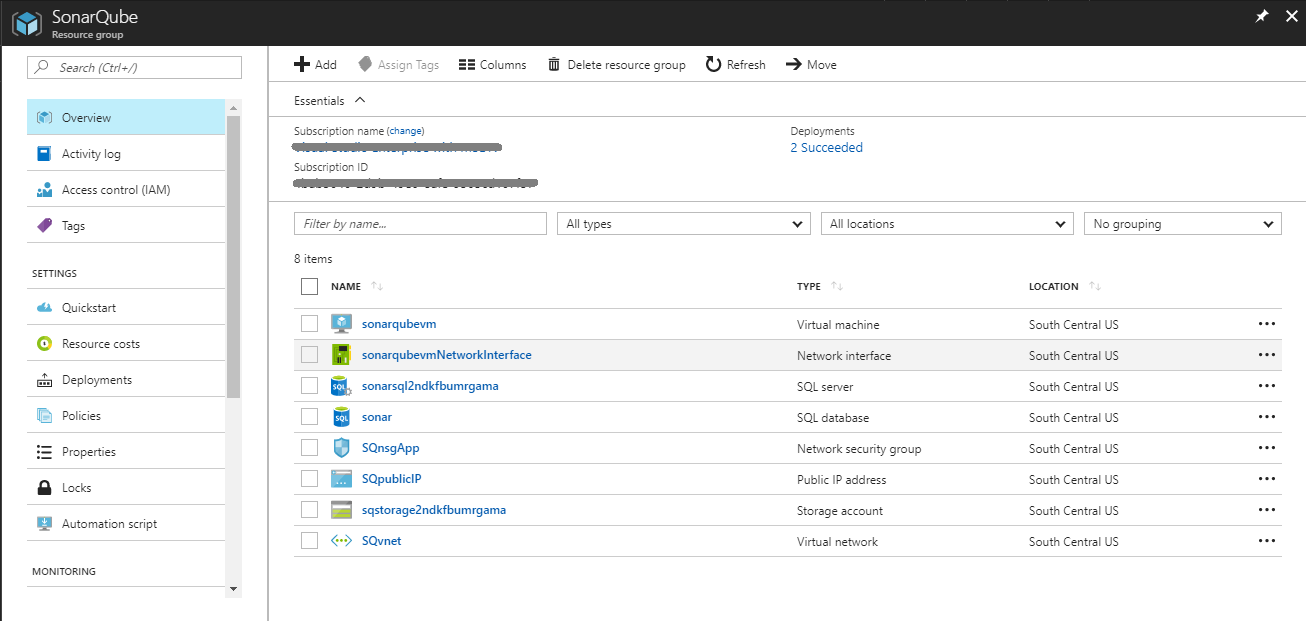
Once the deployment is successful, you will see the resources in Azure Portal.
Exercise 1: Create a SonarQube Project and configure Quality Gate
-
Access the SonarQube portal providing the DNS name suffixed by the port number.
Important: The default port for SonarQube is 9000. Copy the DNS name from the created Virtual Machine in Azure Portal as shown and append :9000 at the end. The final SonarQube URL will be http://YOUR_DNS_NAME:9000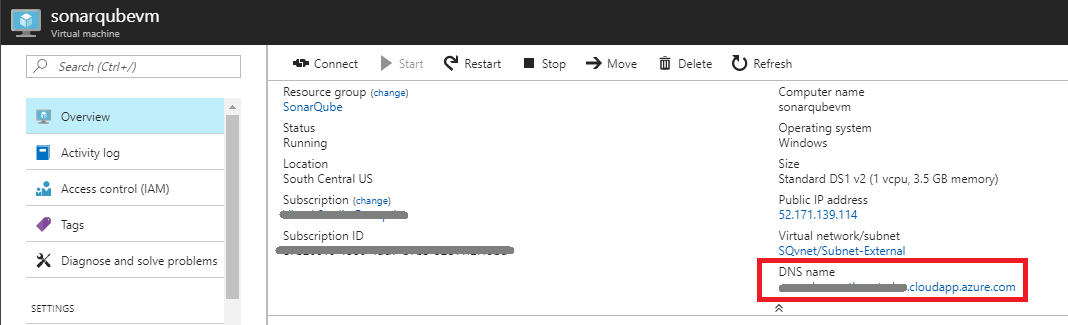
-
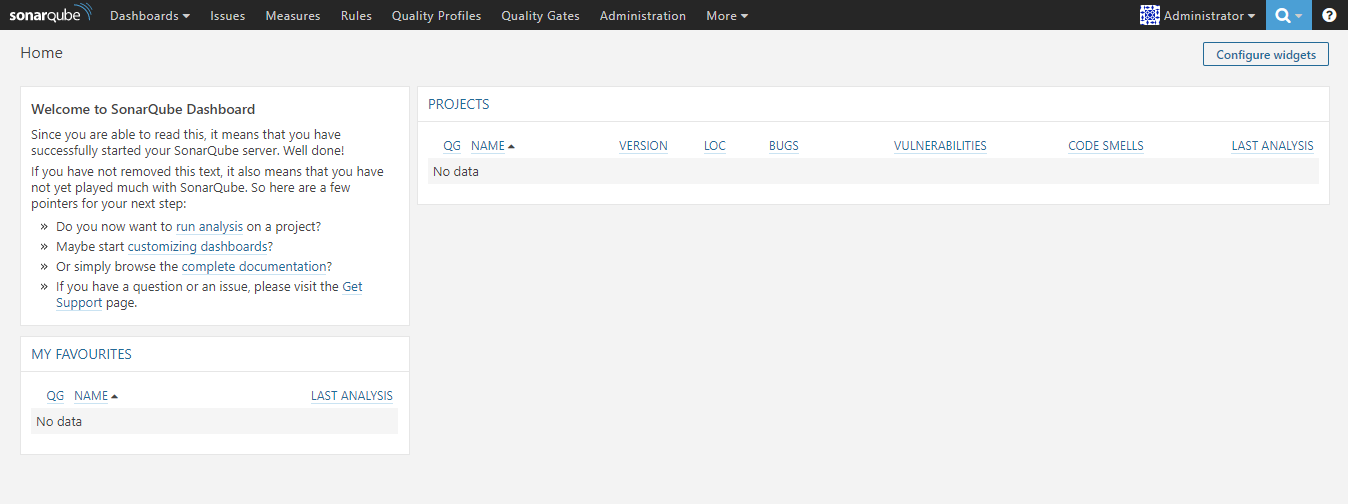
Open a browser and login to the SonarQube Portal using the following credentials-
Username= admin, Password= admin
-
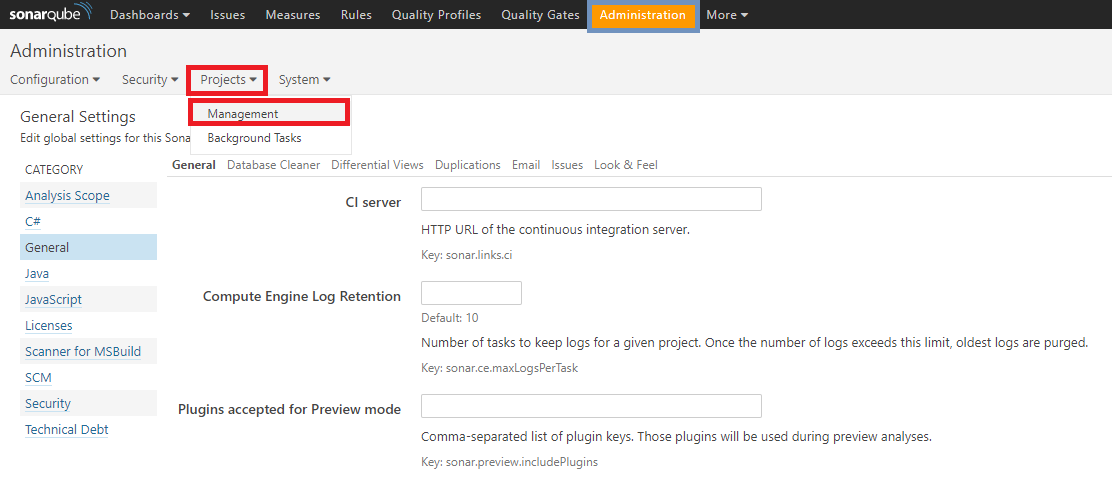
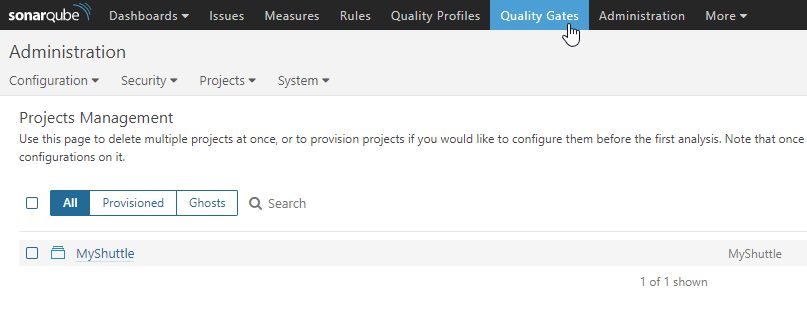
Click on Administration in the toolbar, go to Projects tab and click Management.
-
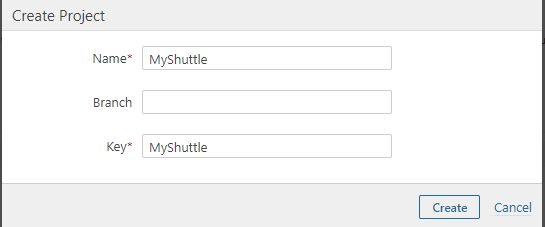
Create a project with Name and Key as MyShuttle.
-
Name: Name of the SonarQube project that will be displayed on the web interface.
-
Branch[Optional]: Code branch which is tracked and reviewed for quality of code.
-
Key: The SonarQube project key that is unique for each project.
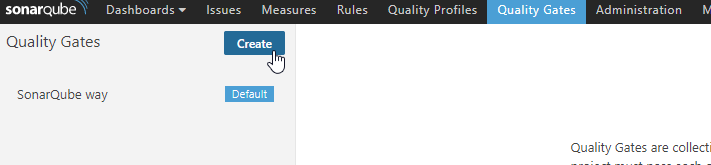
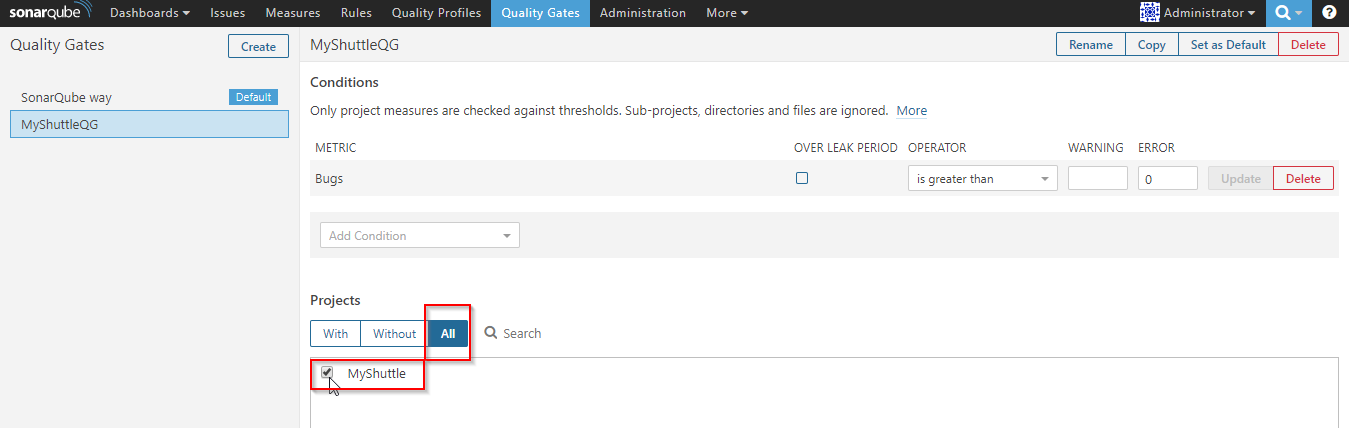
Let us create a Quality Gate to enforce a policy which fails the gate if there are bugs in the code. A Quality Gate is a PASS/FAIL check on a code quality that must be enforced before releasing software.
-
-
Click on Quality Gates menu and click Create in the Quality Gates screen.
-
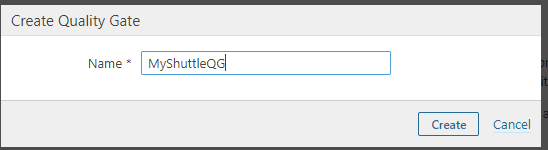
Enter name for the Quality Gate and click Create.
-
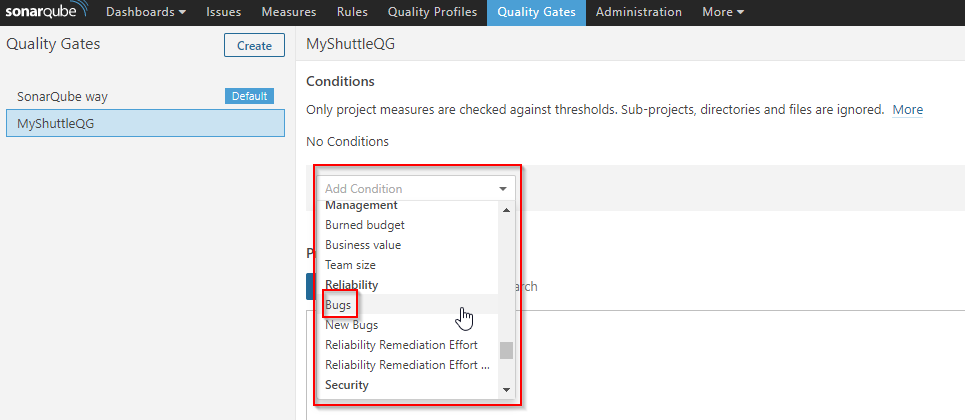
Let us add a condition to check for the number of bugs in the code. Click on Add Condition drop down and select the value Bugs.
-
Change the Operator value to is greater than and the ERROR threshold value to 0 (zero) and click on the Add button.
Note: This condition means that if the number of bugs in Sonar Analysis is greater than 0 (zero), then the quality gate will fail and this fails the VSTS build.
-
To enforce this quality gate for MyShuttle project, click on All under Projects section and select the project checkbox.
Exercise 2: Setting up the VSTS project
-
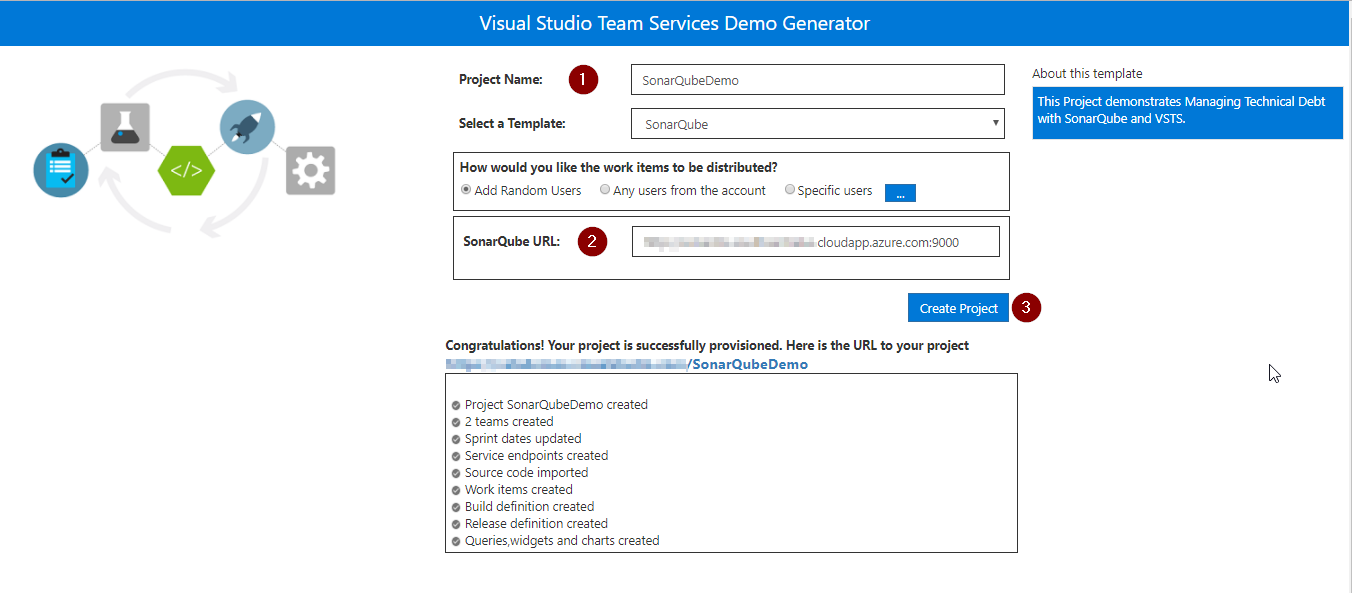
Use the VSTS Demo Generator to provision a project on your VSTS account.
VSTS Demo Generator helps you create team projects on your VSTS account with sample content that include source code, work items,iterations, service endpoints, build and release definitions based on the template you choose during the configuration.
-
Provide the Project Name, the SonarQube URL that was created previously and click on Create Project. Once the project is provisioned, click the URL to navigate.
Exercise 3: Modify the Build to Integrate with SonarQube
Now that the SonarQube server is running, we will modify VSTS build definition to integrate with SonarQube to analyze the java code provisioned by the VSTS Demo Generator system.
-
Go to Builds under Build and Release tab, edit the build definition SonarQube. This is a Java application and we are using Maven to build the code. The Maven task in VSTS includes OOB support for SonarQube. All you need to is to point the SonarQube endpoint that you just created.
-
Click on the Maven task and scroll down to the Code Analysis section. Configure the SonarQube settings as follows-
Parameter Value Notes SonarQube Project Name MyShuttle The name of the project in SonarQube SonarQube Project Key MyShuttle The unique key of the project in SonarQube Note: Here, the SonarQube Project Name and SonarQube Project Key values are based on the values you provide in Exercise 1: Step 3.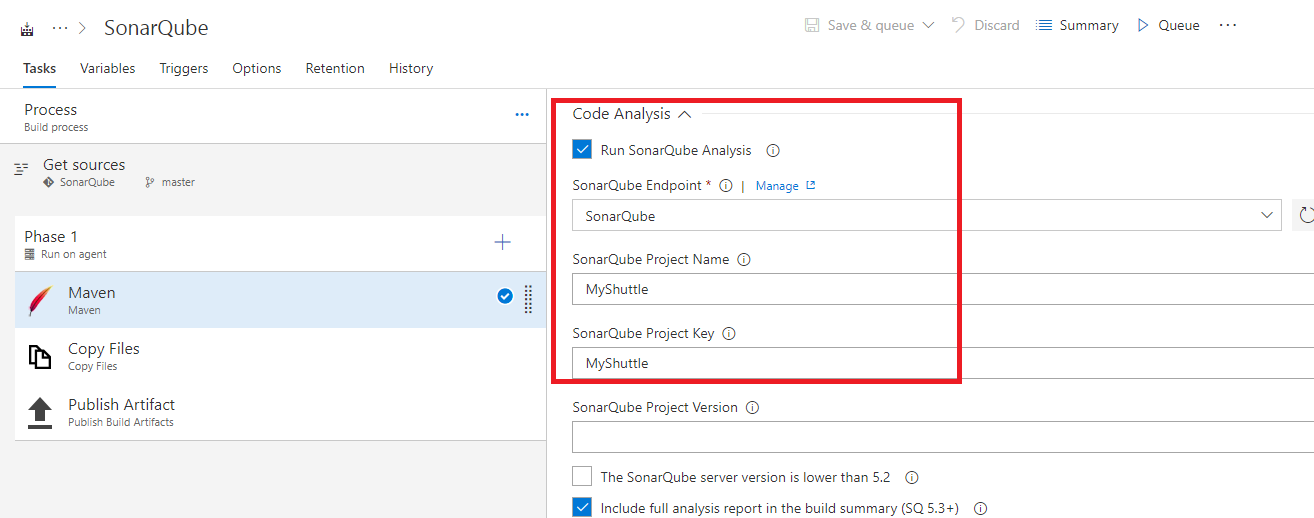
-
Save and queue the build.
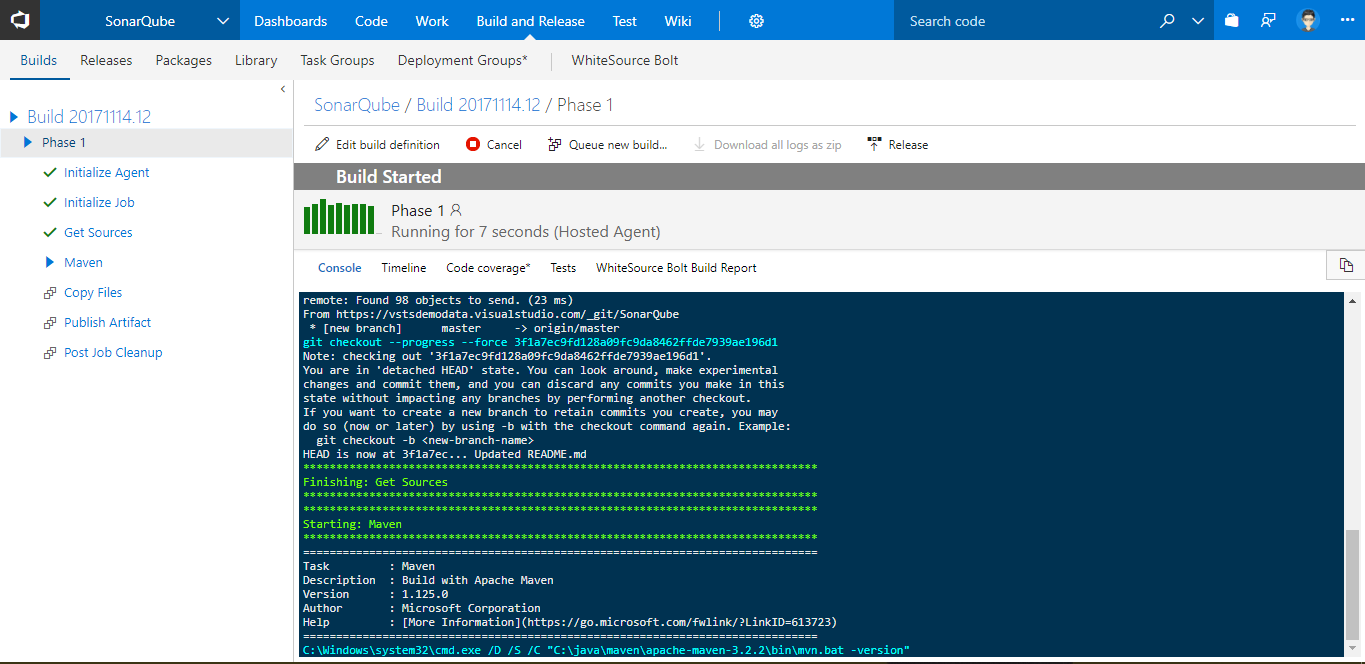
-
You will see that the build has failed since the associated SonarQube Quality Gate has failed. The count of bugs is also displayed under SonarQube Analysis Report.
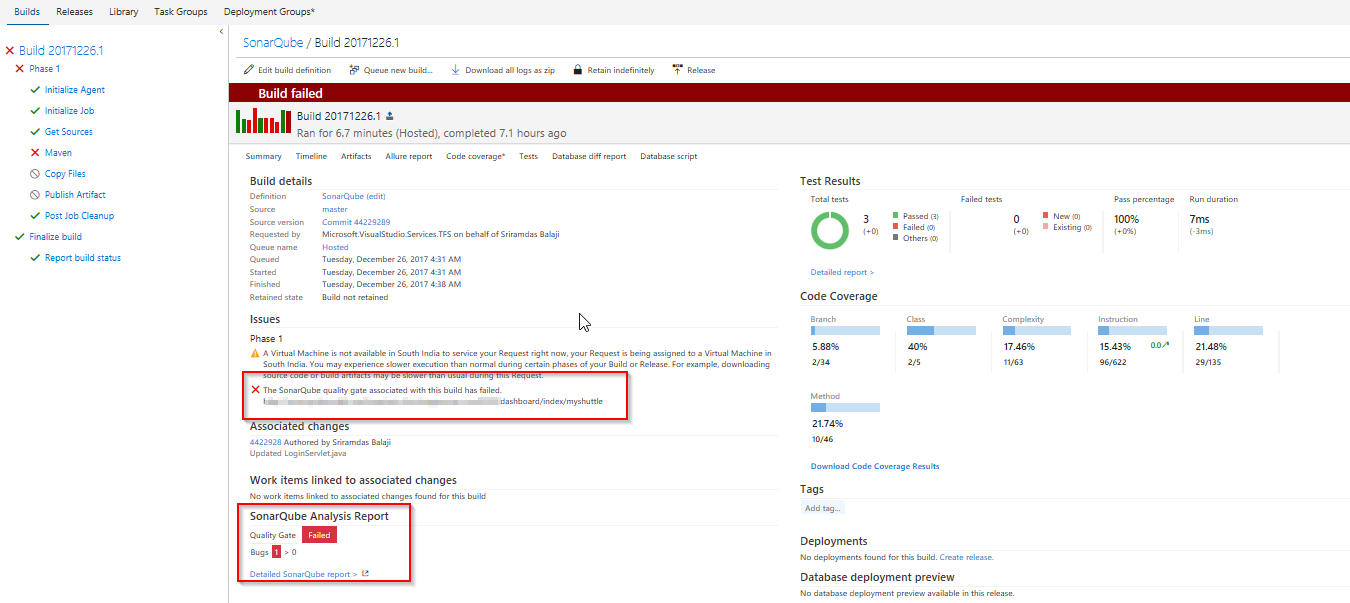
-
Click on the Detailed SonarQube Report link in the build summary to open the project in SonarQube.
Exercise 4: Analyze SonarQube Reports
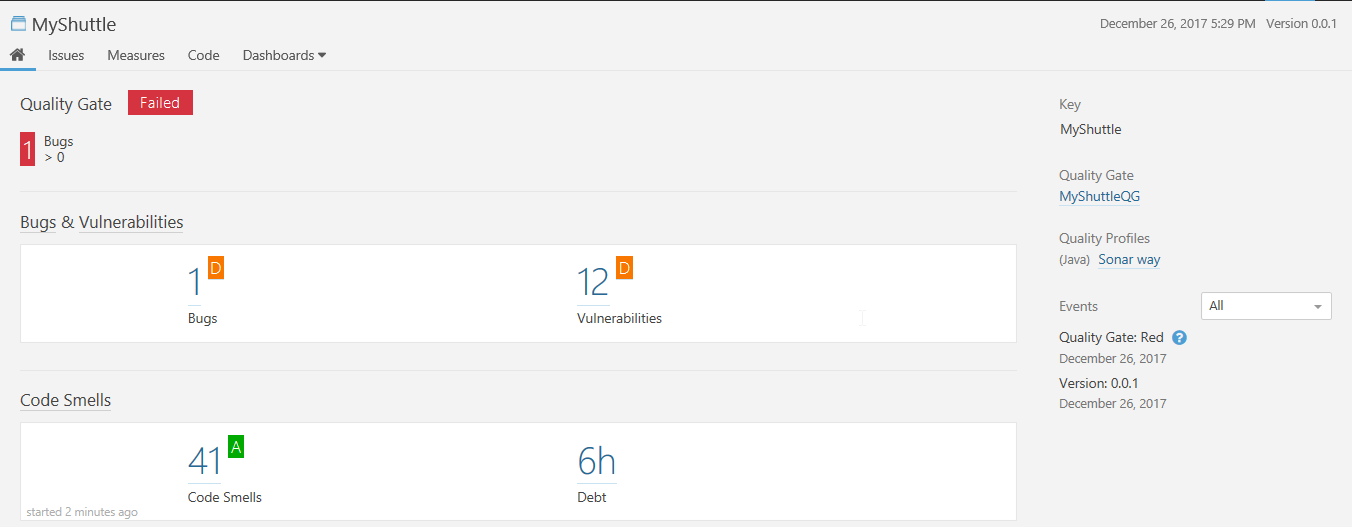
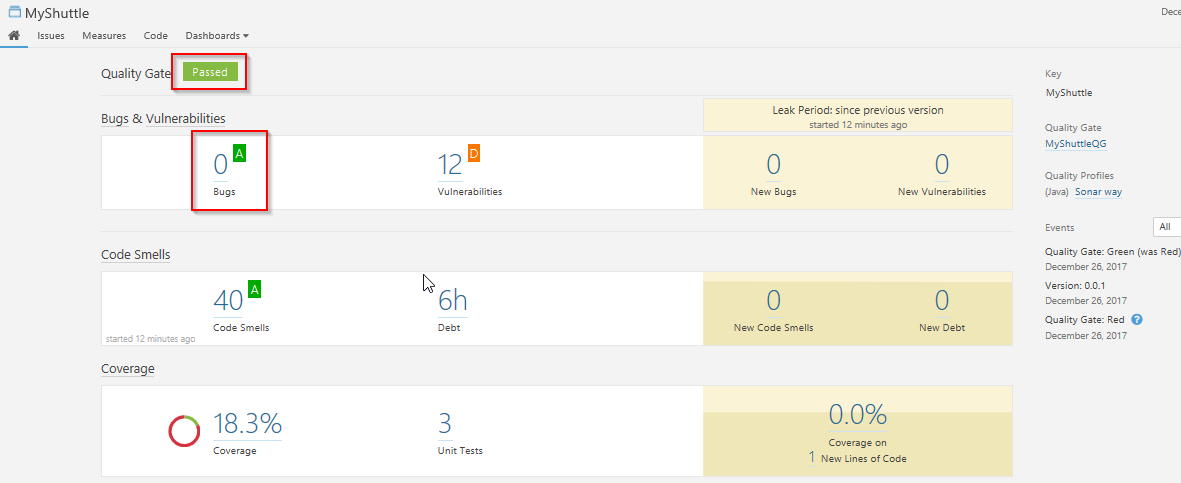
The link will open the MyShuttle project in the SonarQube Dashboard. Under Bugs and Vulnerabilities, we can see a bug has been caught.

The page has other metrics such as Code Smells, Coverage, Duplications and Size. The following table briefly explains each of these terms.
| Terms | Description |
|---|---|
| Bugs | An issue that represents something wrong in the code. If this has not broken yet, it will, and probably at the worst possible moment. This needs to be fixed |
| Vulnerabilities | A security-related issue which represents a potential backdoor for attackers |
| Code Smells | A maintainability-related issue in the code. Leaving it as-is means that at best maintainers will have a harder time than they should making changes to the code. At worst, they’ll be so confused by the state of the code that they’ll introduce additional errors as they make changes |
| Coverage | To determine what proportion of your project’s code is actually being tested by tests such as unit tests, code coverage is used. To guard effectively against bugs, these tests should exercise or ‘cover’ a large proportion of your code |
| Duplications | The duplications decoration shows which parts of the source code are duplicated |
| Size | Provides the count of lines of code within the project including the number of statements, Functions, Classes, Files and Directories |
-
Click on the Bugs count to see the details of the bug.
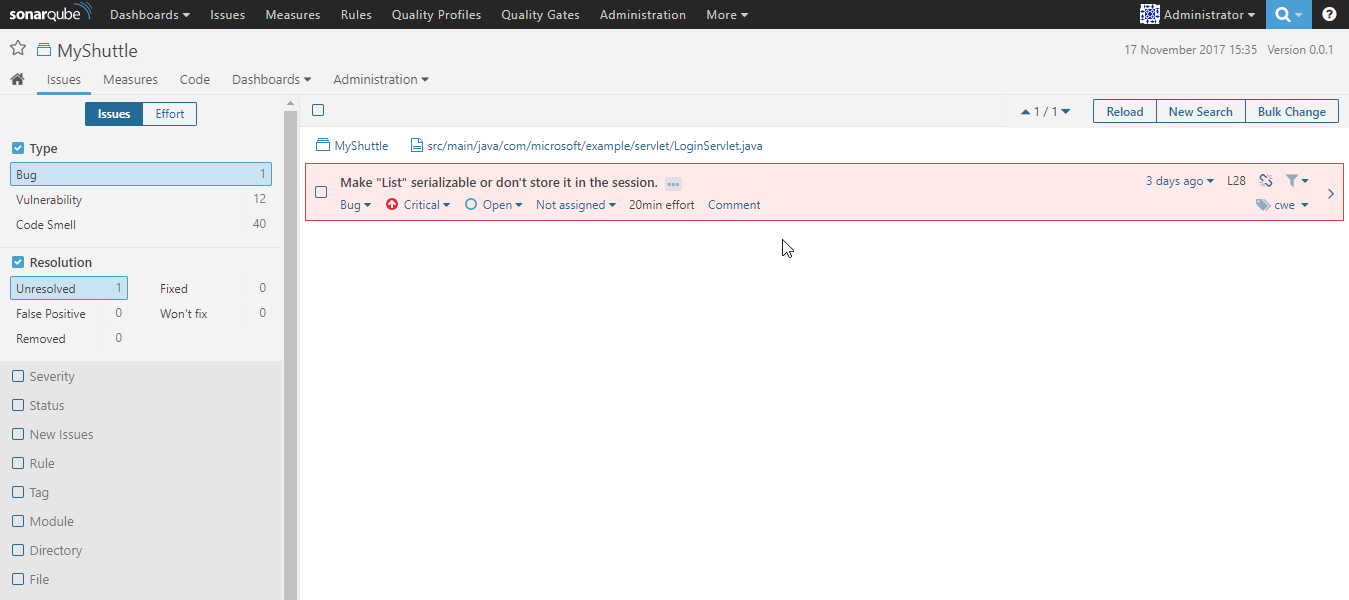
-
You will see the error in line number 28 of LoginServlet.java file as Make “List” serializable or don’t store it in the session.
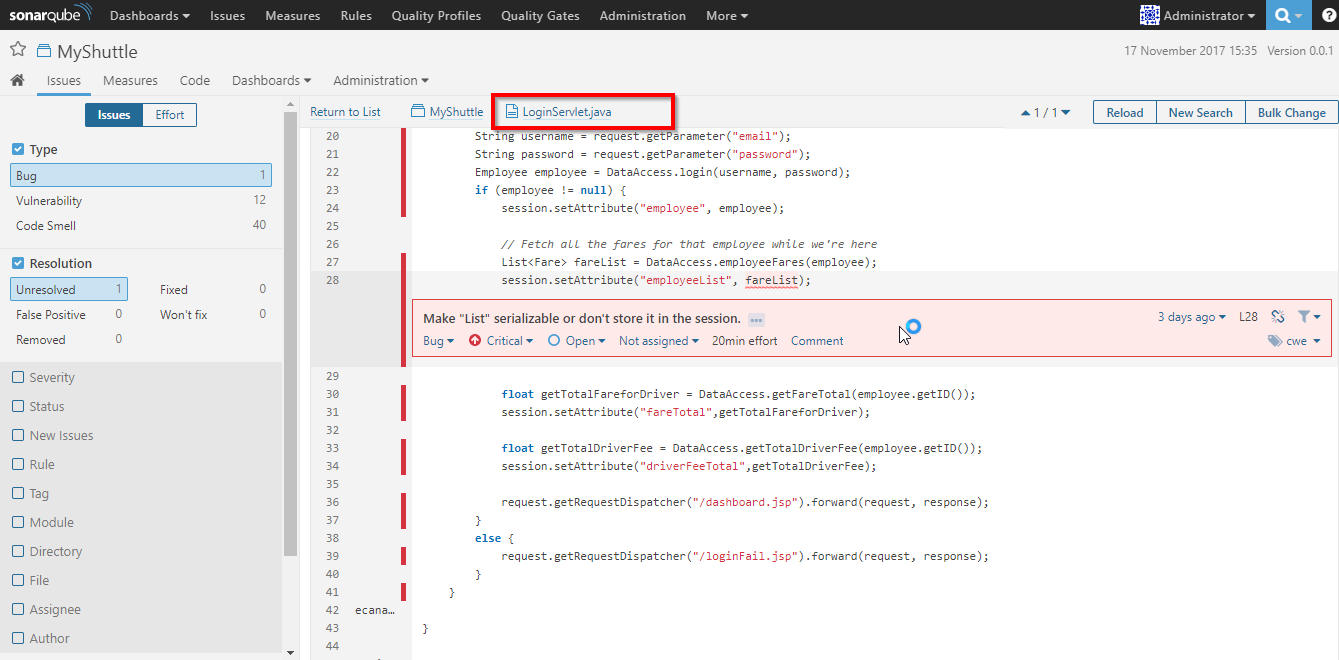
-
The error is because the session attribute accepts only serialized objects. This can be fixed by explicitly casting the list object to serializable. Lets fix this bug -
Go to below path to edit the file in VSTS code tab:-
src/main/java/com/microsoft/example/servlet/LoginServlet.java
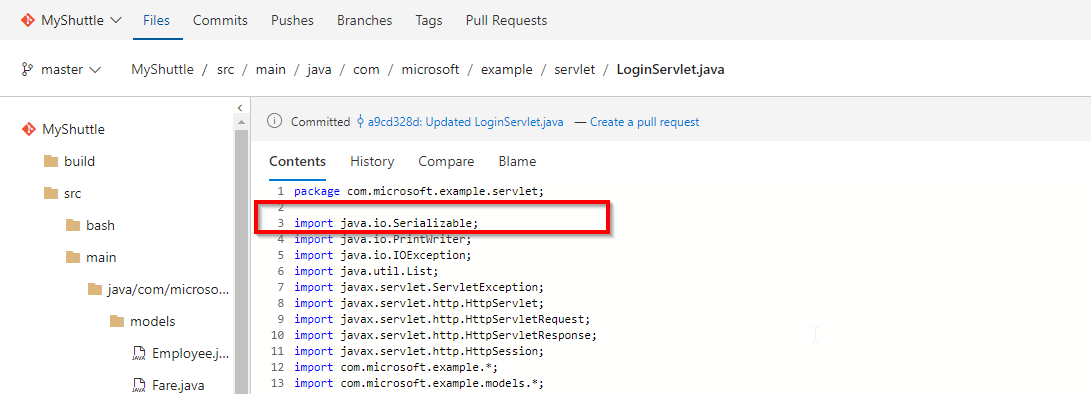
Make the following changes in the code as shown:
-
Go to line number 28 and replace the existing code with below snippet.
session.setAttribute(“employeeList”, (Serializable)fareList);

-
Import the below package.
import java.io.Serializable;
-
-
Commit the changes.
-
Once the CI build completes, you will see the Quality Gate as Passed in the build summary along with a brief view of Test Results, Code Coverage and link to SonarQube Analysis Report.
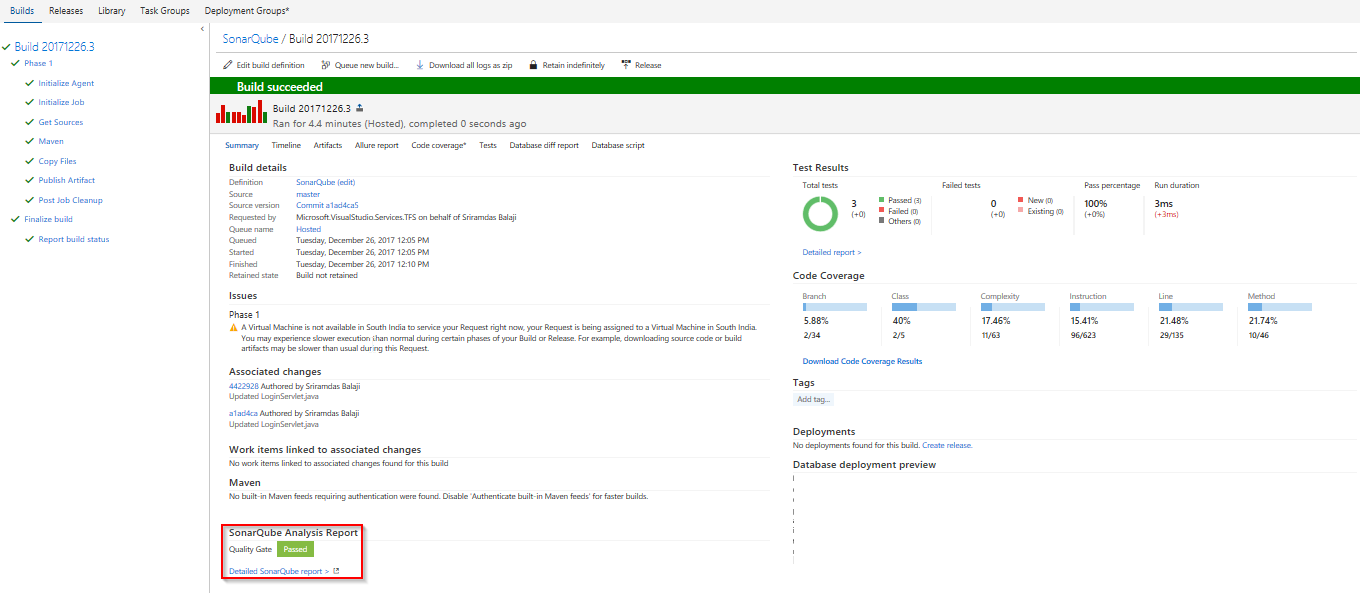
-
Go to SonarQube portal. You will see the bug count is 0.
Summary
With the SonarQube extension for Visual Studio Team Services, you can embed automated testing in your CI/CD pipleine to automate the measurement of your technical debt including code semantics, testing coverage, vulnerabilities. etc.