Last updated : Aug 26, 2019.
Overview
This lab outlines the process to compile a Docker-based ASP.NET Core web application and deploy it to a Kubernetes cluster running on Azure Container Service (AKS) using the Visual Studio Team Services (VSTS).
Azure Container Service (AKS) is the quickest way to use Kubernetes on Azure. AKS provides capabilities to deploy and manage Docker containers using Kubernetes, Docker Swarm and Mesosphere DC/OS orchestrators. With AKS, customers get the benefits of the open source Kubernetes without the complexity and the operational overhead. VSTS helps in creating the application container Docker images for faster deployments reliably using the continuous build option.
Below are the description for the terminolgy used in the lab document to help you get started:
Docker: Docker is a software technology that provides operating-system-level virtualization to easily deploy applications in a sandbox (called containers) to run on Linux.
Images: An image is a read-only template with the necessary instructions required for the application to run.
Containers: Provides an isolated environment in which an app along with its environment is run.
Kubernetes: Kubernetes is an open source system for managing containerized applications across multiple hosts, providing basic mechanisms for deployment, maintenance, and scaling of applications.
Pods: A Pod is the basic building block of Kubernetes and represents a executable unit of work. A Pod usually contains a single container.
Services: A service tells other pods about the services your application provides.
Deployments: A Deployment controller provides declarative updates for Pods
Kubernetes Manifest file: Kubernetes manifests with deployments, services and pods can be defined in json or yaml. The file extensions .yaml, .yml, and .json can be used.
What’s covered in this lab
In this lab, the following tasks will be performed:
-
Create an Azure Container Registry (ACR), AKS and Azure SQL server
-
Provision the VSTS Team Project with a .NET Core application using the VSTS Demo Generator tool
-
Configure endpoints (properties) in VSTS to access Azure and AKS
-
Configure application and database deployment using Continuous Deployment (CD) in VSTS
-
Modify database connection string & ACR configuration in the source code
-
Initiate the build to automatically deploy the application
Reference Architecture
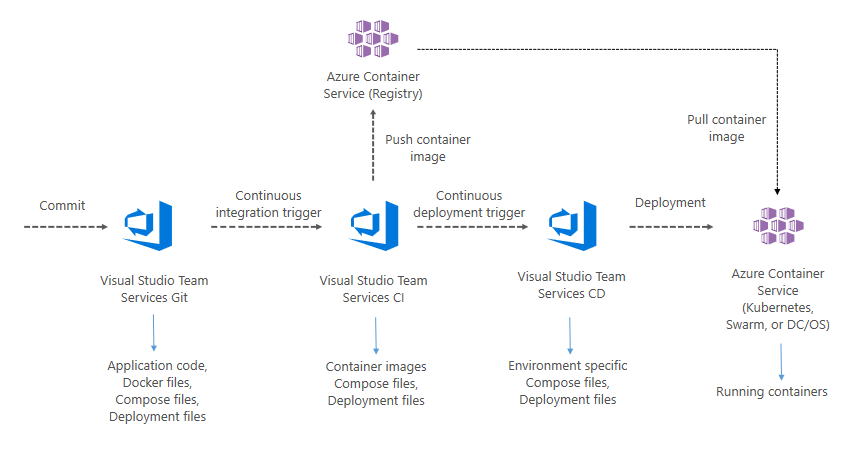
The below diagram details the VSTS DevOps workflow with Azure Container Service with AKS:
-
Firstly, the source code changes are committed to the VSTS git repository
-
VSTS will create the custom Docker image myhealth.web and push the image tagged with the build ID to the ACR. Subsequently it will publish the Kubernetes deployment YAML file as a build artifact.
-
VSTS will deploy mhc-front and mhc-back services into the Kubernetes cluster using the YAML file.
Important: mhc-front is the application hosted on a load balancer whereas mhc-back is the Redis Cache - The Kubernetes cluster will then pull the myhealth.web image from the ACR into the Pods and complete the deployment file instructions
- The myhealth.web application will be accessible through a browser, once the deployment is successfully completed
You can read the full specification of the architecture here
Prerequisites for the lab
-
Microsoft Azure Account: You will need a valid and active Azure account for the Azure labs. If you do not have one, you can sign up for a free trial
-
If you are a Visual Studio Active Subscriber, you are entitled for a $50-$150 Azure credit per month. You can refer to this link to find out more including how to activate and start using your monthly Azure credit.
-
If you are not a Visual Studio Subscriber, you can sign up for the FREE Visual Studio Dev Essentials program to create Azure free account (includes 1 year of free services, $200 for 1st month).
-
-
You will need a Visual Studio Team Services Account. If you do not have one, you can sign up for free here
-
You will need a Personal Access Token to set up your project using the VSTS Demo Generator. Please see this article for instructions to create your token.
Note: You should treat Personal Access Tokens like passwords. It is recommended that you save them somewhere safe so that you can re-use them for future requests. -
Kubernetes extension from Visual Studio Marketplace installed to the VSTS account
Preparing the user machine
This lab requires all the pre-requisite executables to be installed and configured in an Administrator mode on the user machine. If the administrative privileges are not available on the user machine, it is suggested to create a Windows Virtual Machine (VM) on Azure and follow the exercises in the VM.
-
Spin up a Windows virtual machine on Azure.
-
Disable the Internet Explorer Enhanced Configuration to allow download of the rest of the pre-requisite tools.
-
Enable the JavaScript to allow required lab specific features on the webpage.
-
Download and install the Git Bash on the Azure VM.
-
Install the Azure CLI version 2.0.23 on the Azure VM.
Important: Azure CLI is the Azure command line Interface tool required to authenticate to the Azure subscription and fetch the Azure resource group details required in the Exercise 2. -
Download the KubeCtl, and make sure the path of kubectl.exe is included in the PATH Environment Variable of the lab machine.
Important: Kubectl is the command line interface for running commands against Kubernetes clusters. In this lab, Kubectl is used to check the status of pods. - Follow the below instructions to create a pair of SSH RSA public & private keys which will be used in the next exercise.
- Open the Git Bash, type the command
ssh-keygen -t rsaand press the Enter button. - Provide the following values:
- File path : Path to which the generated key file should be saved. Leave it blank to save the file to default path.
- Passphrase : Provide a passphrase or leave it blank for an empty passphrase.
- Access the path where the keys are generated. The contents of the public key id_rsa.pub is required for setting up the environment.
- Open the Git Bash, type the command
- The Azure Service Principal Client ID and Client Secret will be required for the next exercise.
Setting up the environment
The following azure resources need to be configured for this lab:
| Azure resources | Description |
|---|---|
 Azure Container Registry Azure Container Registry |
Used to store the Docker images privately |
 AKS AKS |
Docker images are deployed to Pods running inside AKS |
 SQL Server SQL Server |
SQL Server to host database |
-
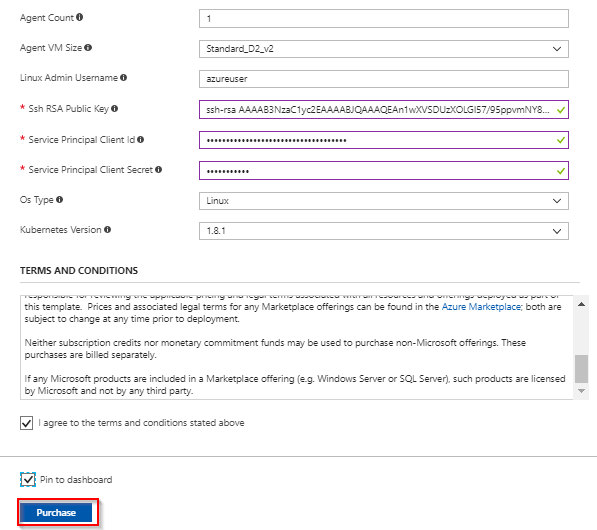
Click on the Deploy to Azure button (or right click and select the Open in new tab option) to spin up Azure Container Registry, Azure Container Service (AKS) and Azure SQL Server. Enter required details for the below fields, agree to the Terms and Conditions, and then click on the Purchase button.
Tip: Since the Azure SQL Server name does not support UPPER / Camel casing naming conventions, use lowercase for the DB Server Name field value.- Subscription
- Resource Group
- Location
- Acr Name
- DB Server Name
- AKS Name
- DNS Prefix
- SSH RSA Public Key
- Service Principal Client
- Service Principal Client Secret
 Important: At the time of writing this lab, only the East US, Central US, West Europe, Canada Central and Canada East are the supported locations. For updates, refer to the AKS Azure Regions
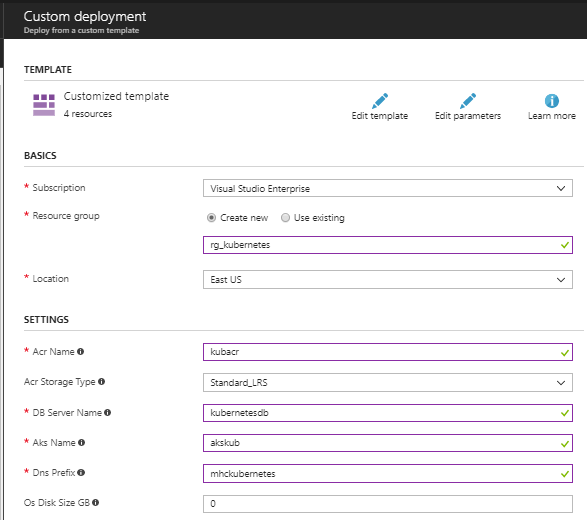
-
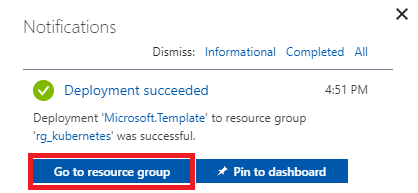
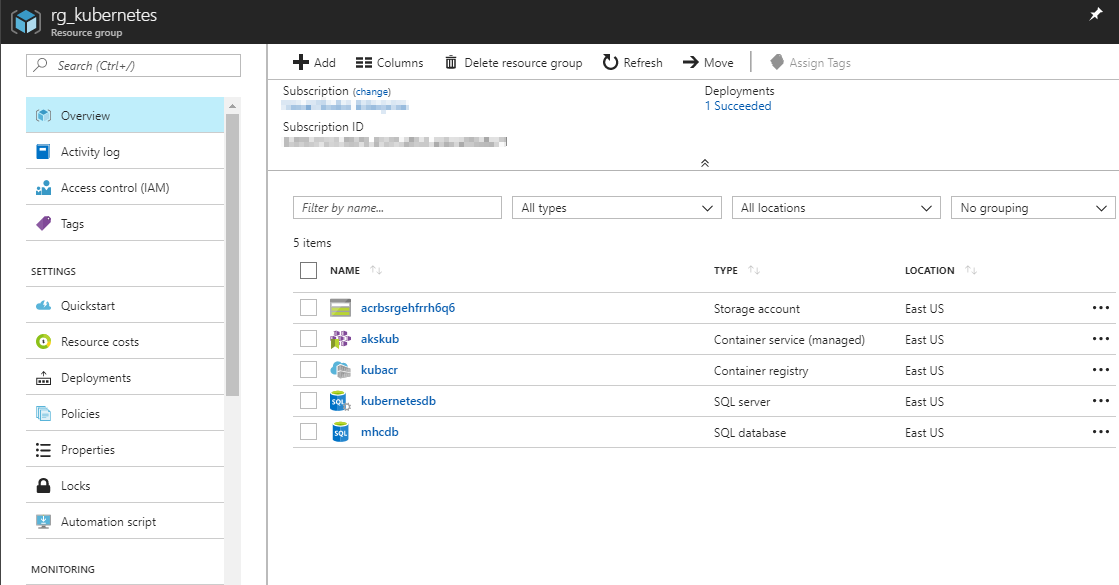
It takes about 5 minutes to provision the environment. Once the deployment succeeds, a notification is displayed in the Azure portal. Click on the Go to resource group button.
-
The following components - Storage account, Container Registry, Container Service, SQL Server along with SQL Database are deployed. Access each of these components individually and make a note of the details to be used in Exercise 2.
-
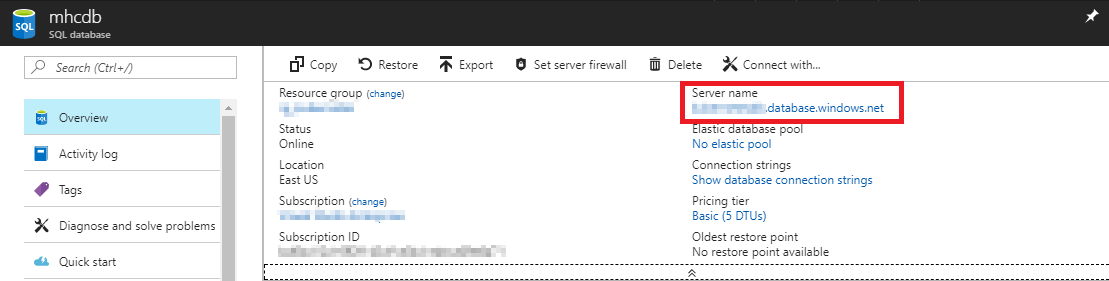
Click on the mhcdb SQL database and make a note of the Server name.
-
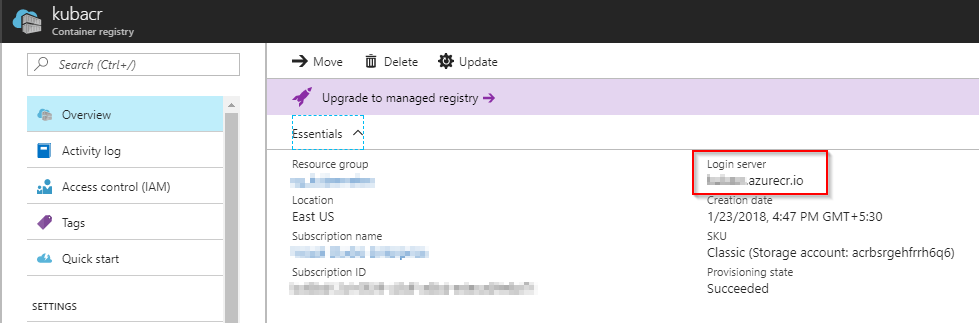
Navigate back to the resource group, click on the created container registry and make a note of the Login server name.
-
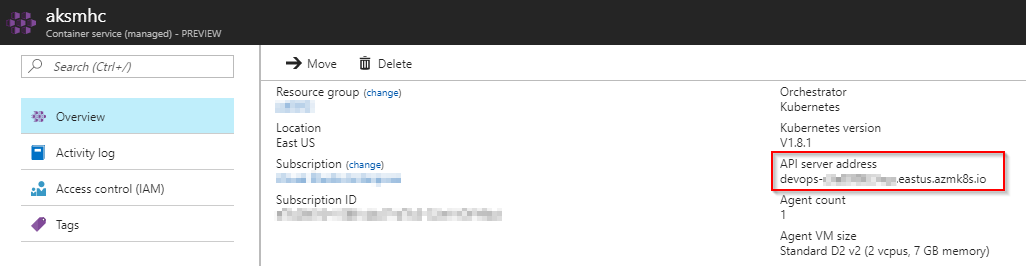
Switch back to the resource group. Click on the container service and make a note of the API server address.
Since all the required azure components are now created, the VSTS team project can be created.
Setting up the VSTS team project
-
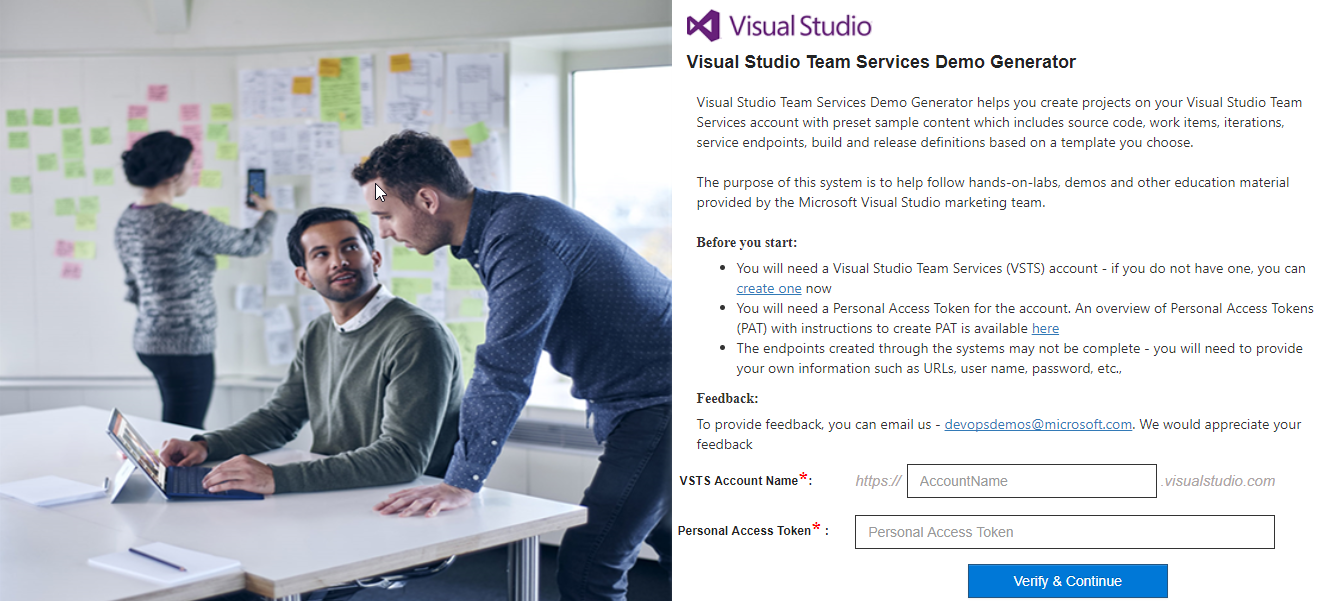
Use the VSTS Demo Generator to provision the project on your VSTS account.
VSTS Demo Generator helps you create the team projects on your VSTS account with sample content that include source code, work items, iterations, service endpoints, build and release definitions based on the template you choose during the configuration.
-
Provide the Project Name, and click on the Create Project button.
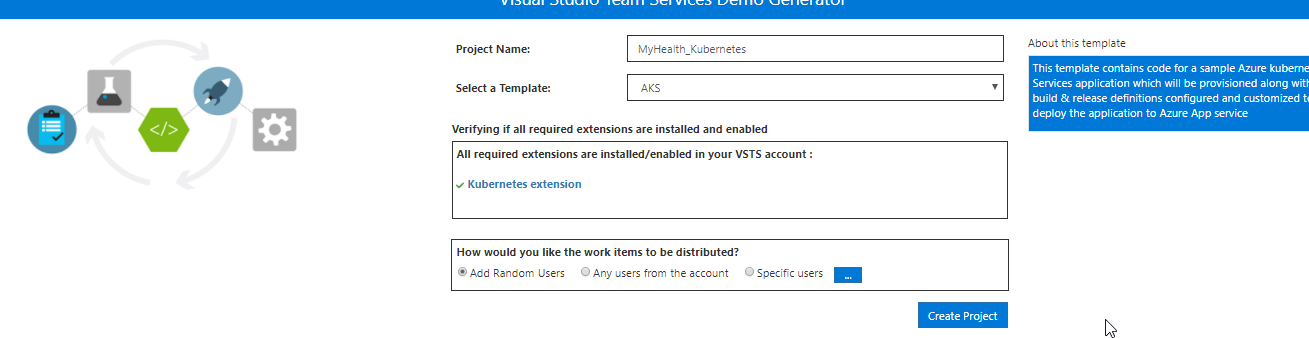
-
Once the project is provisioned, click on the link displayed under the URL field to navigate to the team project.

Exercise 1: Service Endpoint creation
Service endpoints are a bundle of properties securely stored by the VSTS and is a way for VSTS to connect to the external systems or services.
Since the connections are not established during project provisioning,the two endpoints - Azure Resource Manager and Kubernetes need to be created manually.
-
Azure Resource Manager Service Endpoint: Defines and secures a connection to a Microsoft Azure subscription using Service Principal Authentication (SPA).
-
In the VSTS, navigate to the Services by clicking on the gear icon
 , and click on the + New Service Endpoint button. Select the Azure Resource Manager and specify the Connection name, select the Subscription from the dropdown and click on the OK button. This endpoint will be used to connect the VSTS and the Azure.
You will be prompted to authorize this connection with Azure credentials. Disable pop-up blocker in your browser if you see a blank screen after clicking the OK button, and retry the step.
Tip: If your subscription is not listed or to specify an existing service principal, click the link in the dialog which will switch to manual configuration mode and follow the Service Principal creation instructions.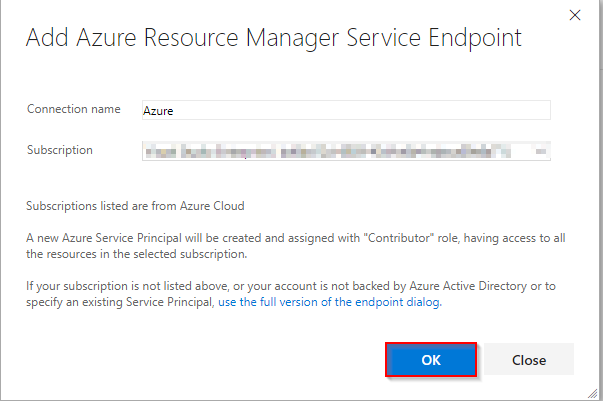
-
-
Kubernetes Service Endpoint
-
Click the + New Service Endpoint button, and select Kubernetes from the list. We can use this endpoint to connect the VSTS and the Azure Container Service (AKS).
-
Connection Name: Provide the connection name.
-
Server URL: Provide the container service address in the format
http://{API server address} -
Kubeconfig: To get the Kubeconfig value, run the following Azure commands in a command prompt launched with the Administrator privilege.
-
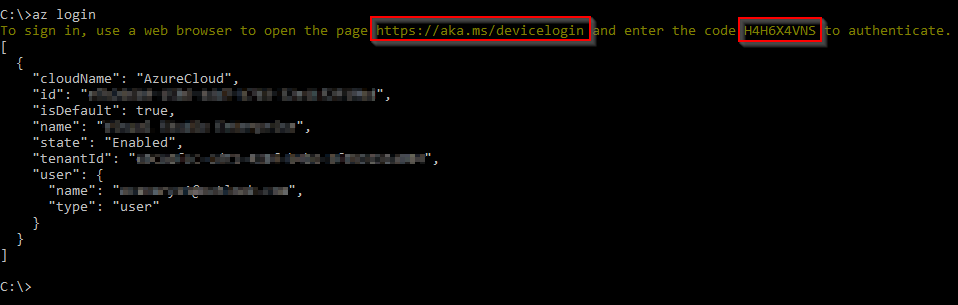
Type az login in the command prompt and hit Enter. Authorize your login by accessing the url given in the prompt and enter the provided unique code to complete the authentication.
-
Type az aks get-credentials –resource-group yourResourceGroup –name yourAKSname in the command prompt to get the access credentials for the Kubernetes cluster.

-
Navigate to the .kube folder under your home directory (eg: C:\Users\YOUR_HOMEDIR\ .kube)
-
Copy the contents of the config file and paste it in the Kubernetes Connection window. Click the OK button.

-
-
Exercise 2: Configure Build and Release definitions
Now that the connections are established, we will manually map the created Azure endpoint, AKS and Azure Container Registry to the build and release definitions.
-
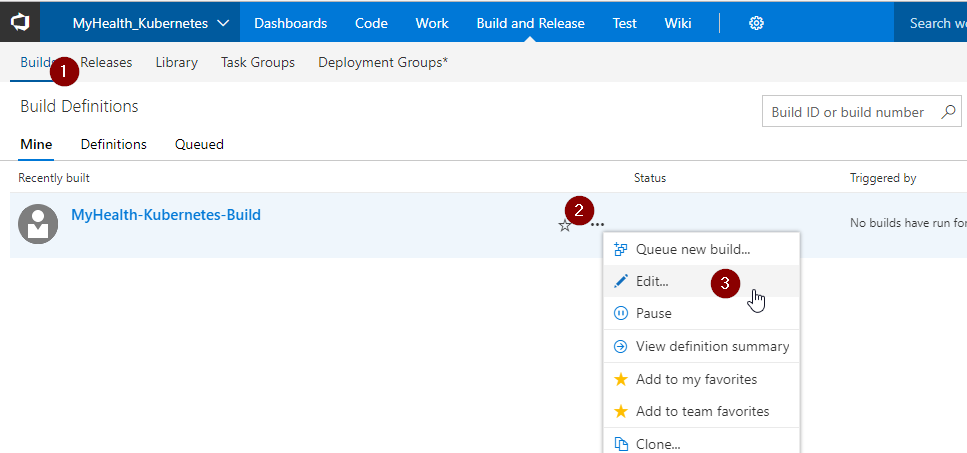
Select the Builds section under the Build and Release hub and Edit the build definition MyHealth.AKS.Build.
-
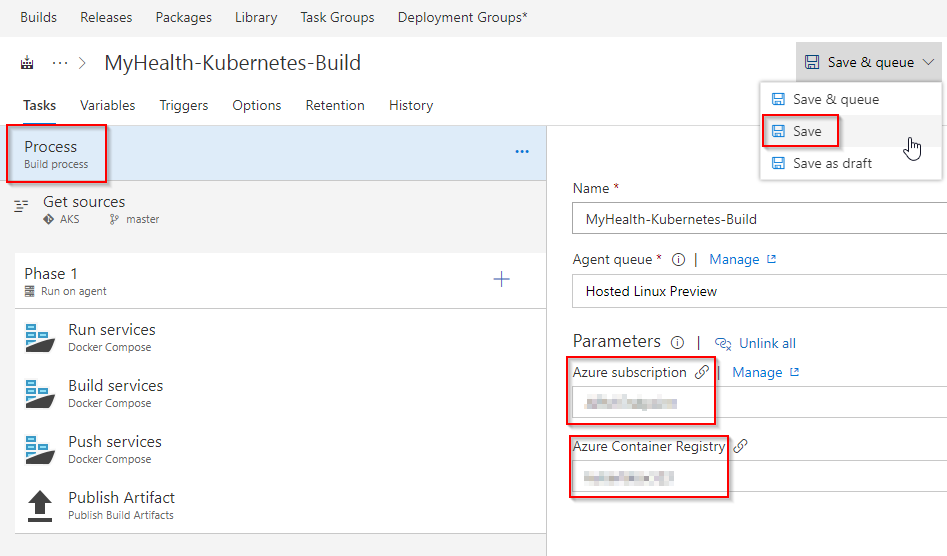
In the Process section under the Tasks tab, select the previously created endpoints from the dropdown for the parameters - Azure subscription and Azure Container Registry as shown. Click the Save option.
Tasks Usage  Run services
prepares the suitable environment by restoring required packages Build servicesbuilds the docker images specified in a docker-compose.yml file with registry-qualified names and additional tags such as $(Build.BuildId) Push servicespushes the docker images specified in a docker-compose.yml file, to the container registry  Publish Build Artifacts
publishes the myhealth.dacpac file to VSTS -
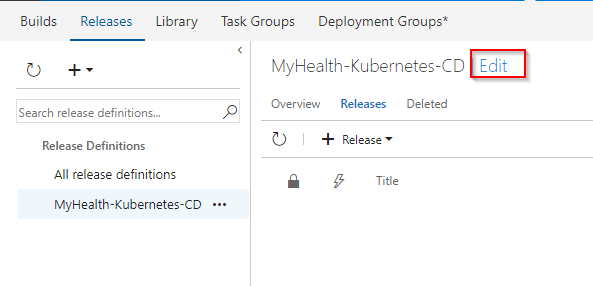
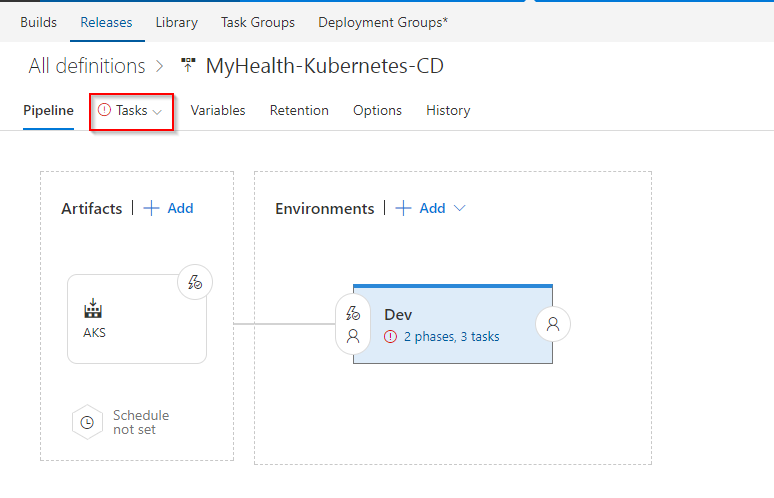
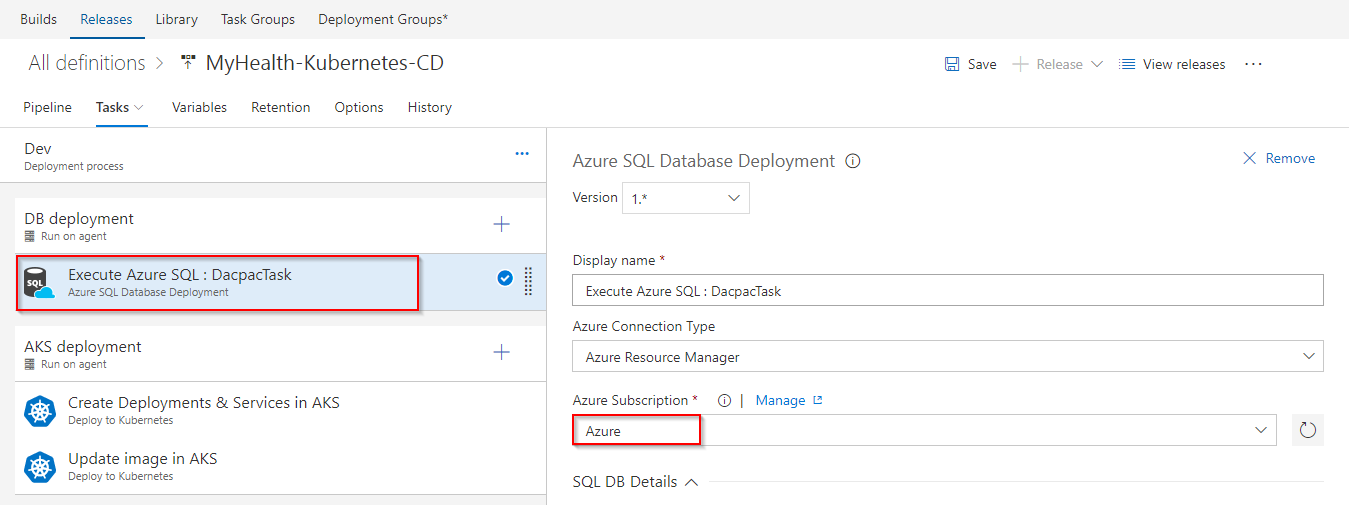
Navigate to the Releases section under the Build & Release menu, Edit the release definition MyHealth.AKS.Release and select Tasks.
-
In the Dev environment, under the DB deployment phase, update the Azure Subscription value from the dropdown for Execute Azure SQL: DacpacTask task.
-
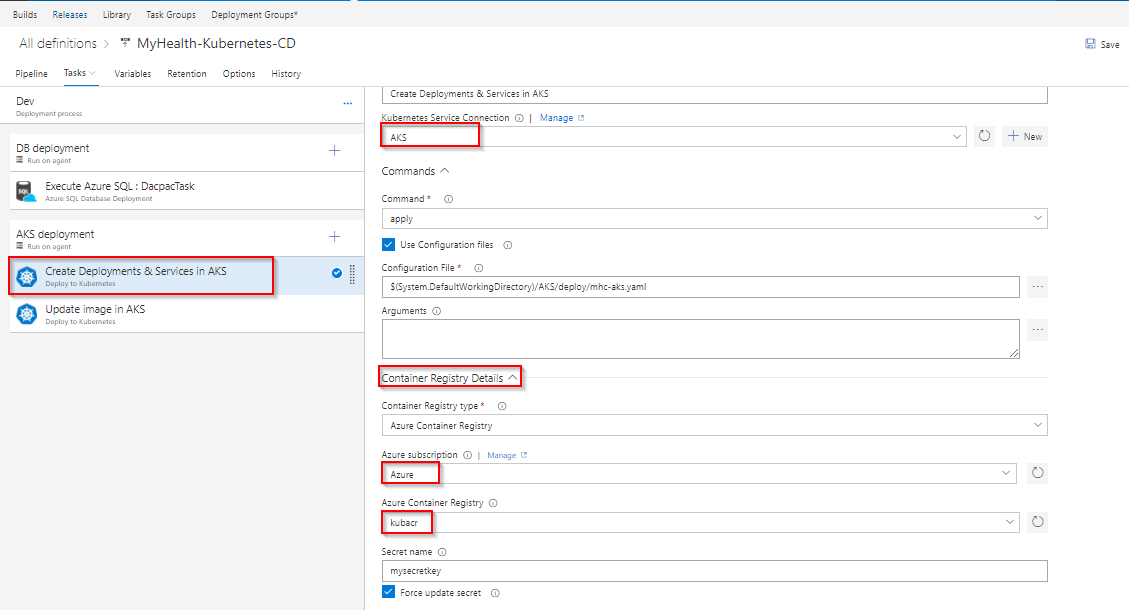
In the AKS deployment phase, Under the Create Deployments & Services in AKS task, update the Kubernetes Service Connection value from the dropdown. Expand the Container Registry Details section and update the parameters - Azure subscription and Azure Container Registry with the endpoint components from the dropdown.
-
Repeat similar steps for Update image in AKS task.
-
Create Deployments & Services in AKS will create the deployments and services in AKS as per the configuration specified in mhc-aks.yaml file. The Pod, for the first time will pull the latest docker image.
-
Update image in AKS will pull the appropriate image corresponding to the BuildID from the repository specified, and deploys the docker image to the mhc-front pod running in AKS.
-
-
Click on the Variables section under the release definition, update ACR and SQL server values for Process Variables with the details noted earlier while configuring the environment. Click on the Save button.
Note: The Database Name is set to mhcdb and the Server Admin Login is sqladmin and Password is P2ssw0rd1234.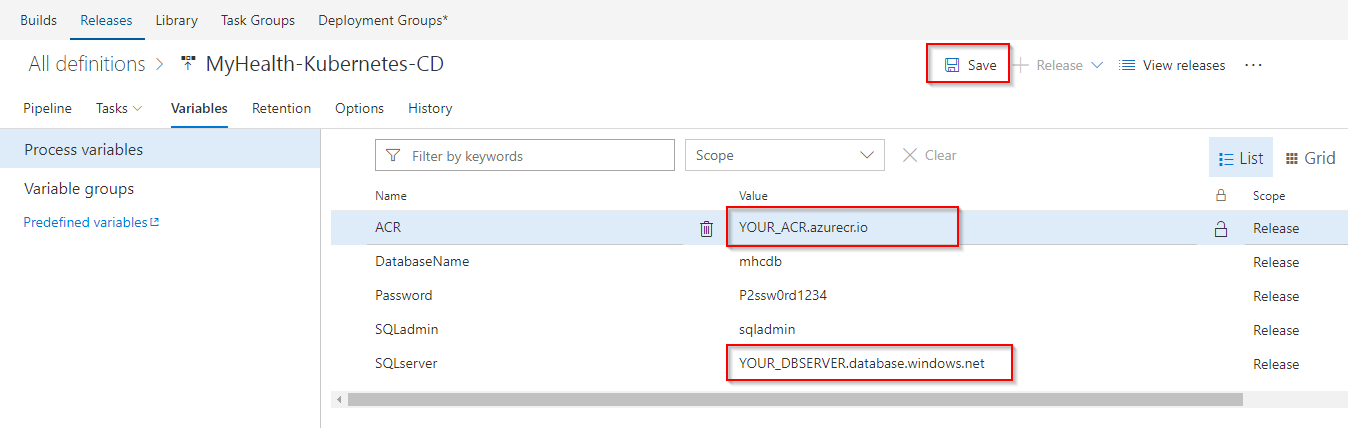
Exercise 3: Update Connection String & ACR URL in the manifest file
We will update the database connection string for the .NET Core application and ACR URL in the manifest YAML file.
-
Click on the Code tab, and navigate to the below path
AKS/src/MyHealth.Webto edit the fileappsettings.jsonScroll down to the line number 9 and provide the database server name as given in the step 6 of the previous exercise and manually update the User ID to
sqladminand Password toP2ssw0rd1234. Click on the Commit button.Important: “DefaultConnection”: “Server=YOUR_SQLSERVER_NAME.database.windows.net,1433;Database=mhcdb;Persist Security Info=False;User ID=sqladmin;Password=P2ssw0rd1234”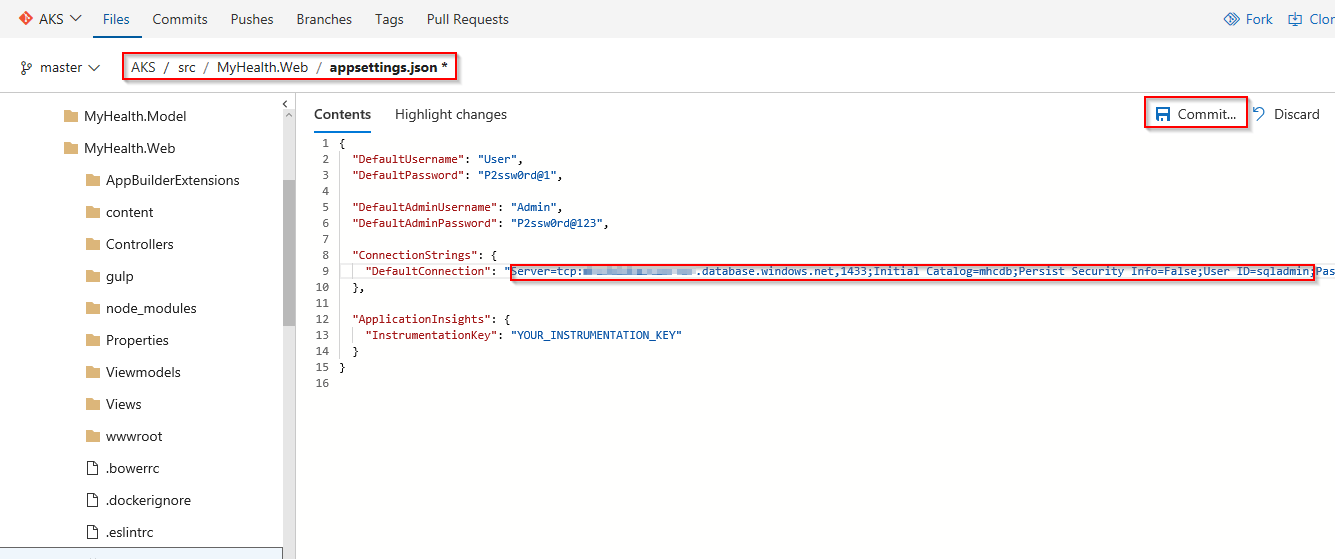
-
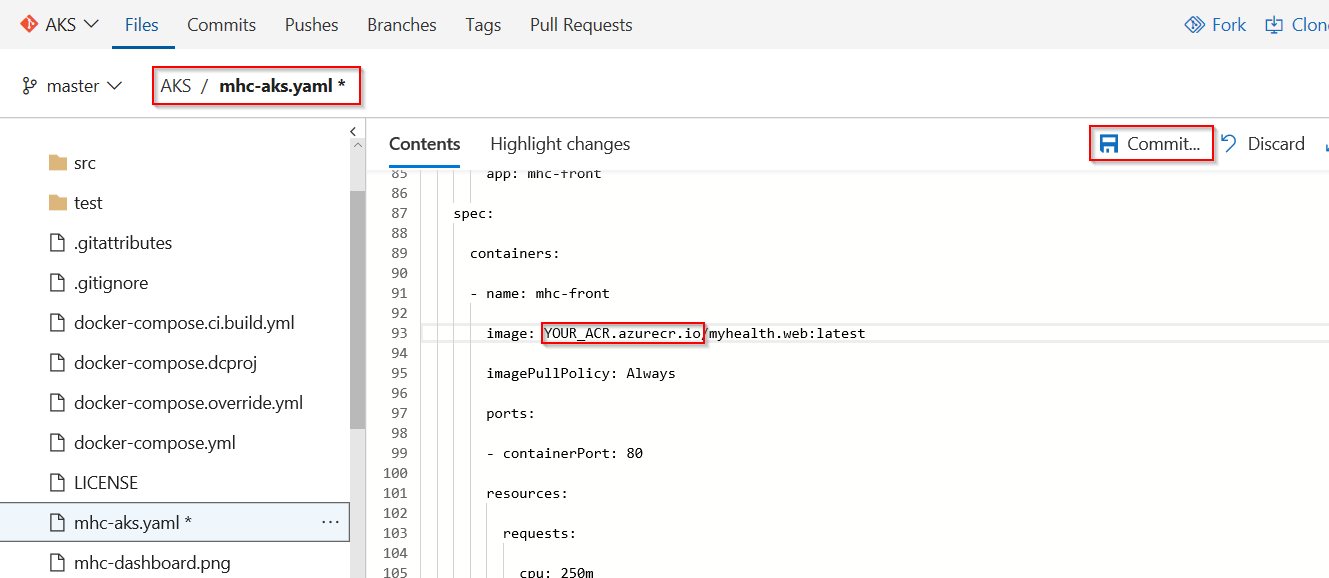
Navigate to the
AKSpath to edit the filemhc-aks.yaml. This YAML manifest file contains configuration details of deployments,services and pods which will be deployed in Kubernetes.Scroll to the line number 93. modify the value YOUR_ACR with your ACR Login server which was noted earlier while setting up the environment. Click on the Commit button.
Exercise 4: Trigger a Build and deploy application
In this exercise, let us trigger a build manually and upon completion, an automatic deployment of the application will be triggered. Our application is designed to be deployed in the pod with the load balancer in the front-end and Redis cache in the back-end.
-
Click on the Builds section under the Build and Release tab, click on the build definition MyHealth.AKS.Build and then click on the Queue new build… button.

-
Once the build process starts, navigate to the Builds tab. Click on the build number to see the build in progress.


-
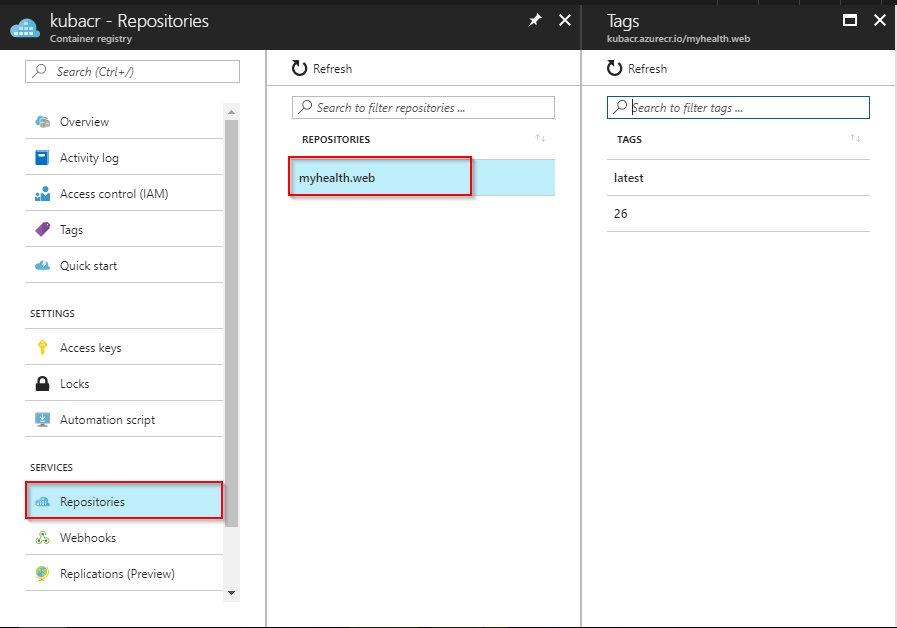
The build will generate and push the docker image to ACR. After the build completes, you will see the build summary. To view the generated images in the Azure Portal, click on the Azure Container Registry and navigate to the Repositories.
-
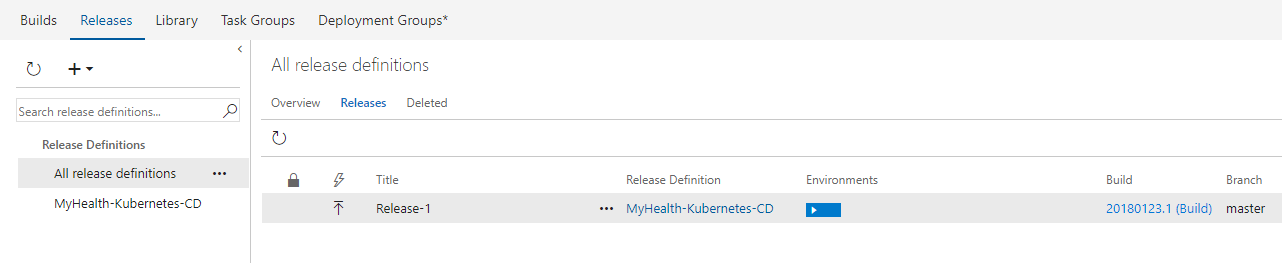
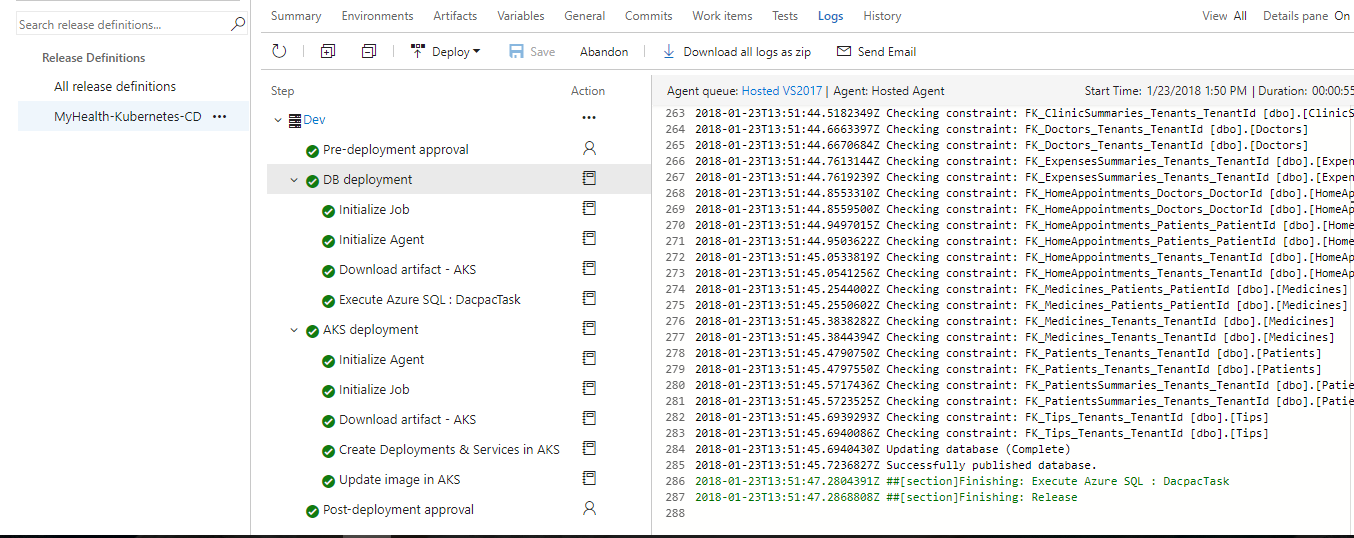
Switch back to the VSTS portal. Click on the Releases section on the Build & Releases tab, and double-click on the latest release. Click on the Logs section to see the release summary.
-
Once the release is complete, launch the command prompt and run the below command to see the pods running in AKS:
**kubectl get pods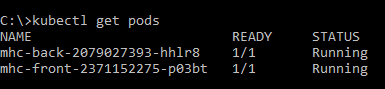
The deployed web application is running in the displayed pods.
-
To access the application, run the below command. If you see that External-IP is pending, wait for sometime until an IP is assigned.
**kubectl get service mhc-front --watch
-
Copy the External-IP and paste it in the browser and hit the Enter button to launch the application.

Access AKS through the browser Type the below command in the command prompt to access the AKS through the browser.
az aks browse --resource-group <yourResourceGroup> --name <yourAKSname>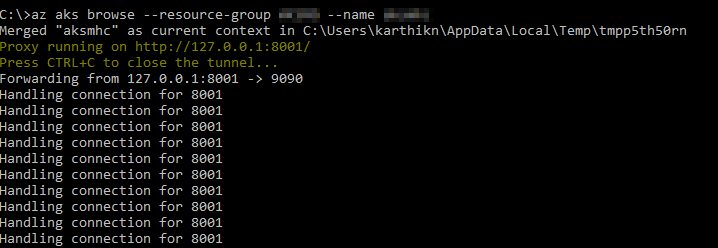
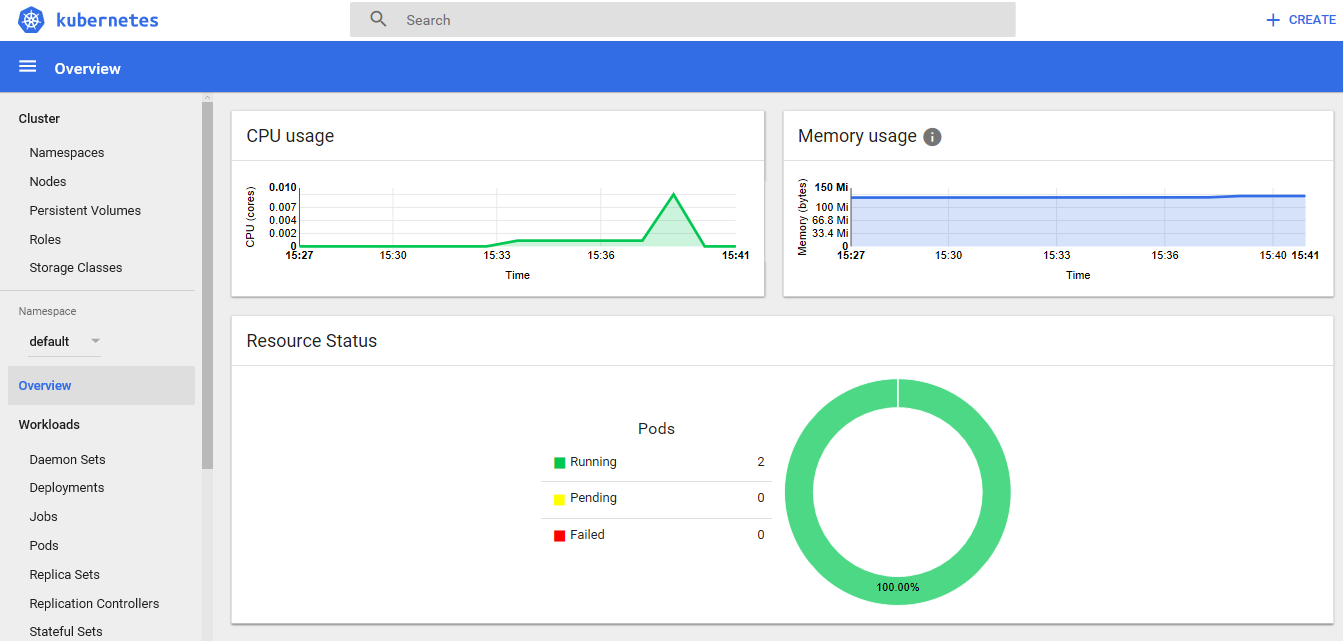
AKS Dashboard: Once the AKS dashboard is launched, the following details will be displayed.
Summary
AKS reduces the complexity and operational overhead of managing a Kubernetes cluster by offloading much of that responsibility to Azure. With the Visual Studio Team Services and Azure Container Services (AKS), we can build DevOps for dockerized applications by leveraging docker capabilities enabled on VSTS Hosted Agents.