Last updated : Aug 26,2019
Overview
With Azure Web App for containers, it is easy to deploy container-based web apps. You can pull container images from Docker Hub or a private Azure Container Registry, and deploy the containerized app with your preferred dependencies to production in seconds.
What’s covered in this lab
In this lab, you will learn how you can use Release Management(RM) in Visual Studio Team Services (VSTS) to deploy a container Java web application to an Azure web app for containers.
This lab will show how you can
- Create a new Azure App Service and configure it to use Apache Tomcat
- Create a new MySQL database
- Use Azure App Service Task to deploy a WAR file
Prerequisites for the lab
-
Microsoft Azure Account: You will need a valid and active Azure account for the Azure labs. If you do not have one, you can sign up for a free trial
-
If you are an active Visual Studio Subscriber, you are entitled for a $50-$150 credit per month. You can refer to this link to find out more information about this including how to activate and start using your monthly Azure credit.
-
If you are not a Visual Studio Subscriber, you can sign up for the FREE Visual Studio Dev Essentials program to create a Azure free account (includes 1 year of free services, $200 for 1st month).
-
-
You will need a Visual Studio Team Services Account. If you do not have one, you can sign up for free here
-
You will need a Personal Access Token to set up your project using the VSTS Demo Generator. Please see this article for instructions to create your token.
Note: You should treat Personal Access Tokens like passwords. It is recommended that you save them somewhere safe so that you can re-use them for future requests. -
The Docker Integration extension installed and enabled on the VSTS account.
If you are following this lab from “Working with Jenkins, VSTS and Azure, you can skip the next two exercises and go to deploy.
Exercise 1: Setting up Visual Studio Team Services
If you are following this lab from Working with Eclipse you can skip this exercise. Otherwise,
-
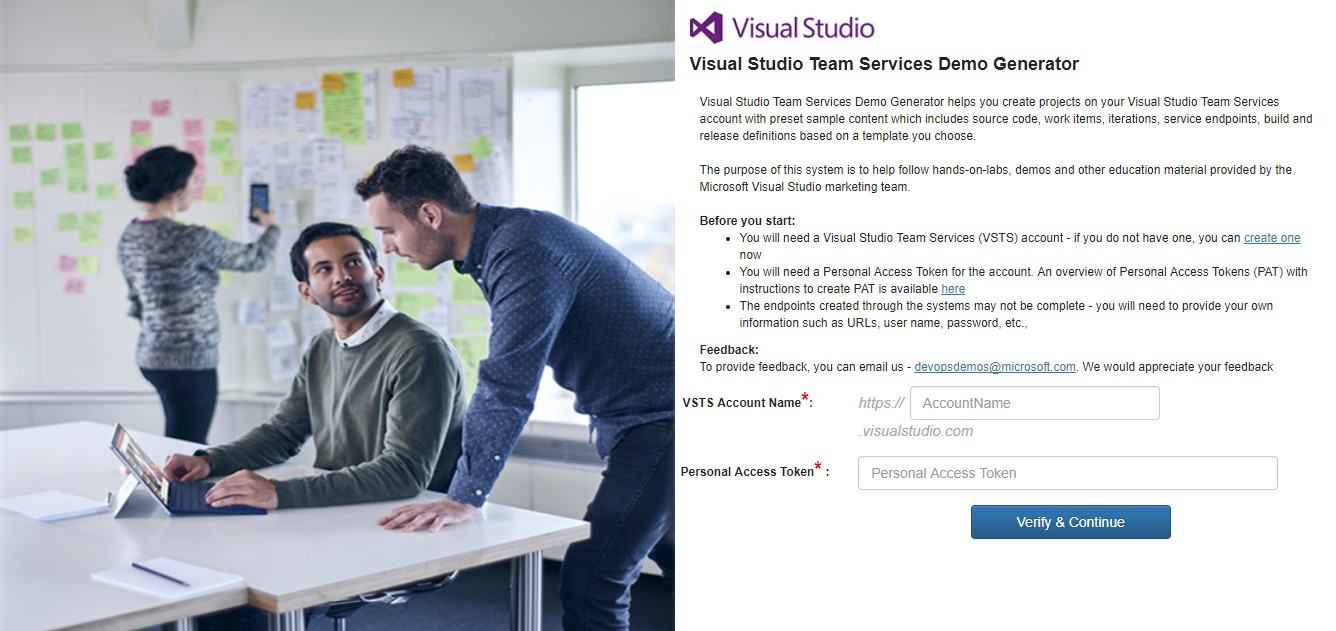
Use the VSTS Demo Generator to provision the team project on the VSTS account.
VSTS Demo Generator helps you create team projects on your VSTS account with sample content that include source code, work items,iterations, service endpoints, build and release definitions based on the template you choose during the configuration.
-
Once the team project is provisioned, click on the URL to navigate to the team project.
 Note: This URL will automatically select the MyShuttleDocker template in the demo generator. If you want to try other projects, use this URL instead - https://vstsdemogenerator.azurewebsites.net/
Exercise 2: Create a VSTS Build to Build Docker Images
In this task you will configure the VSTS build definition that will build and push the image to an Azure Container Registry
-
Open the Azure Portal in a separate tab
-
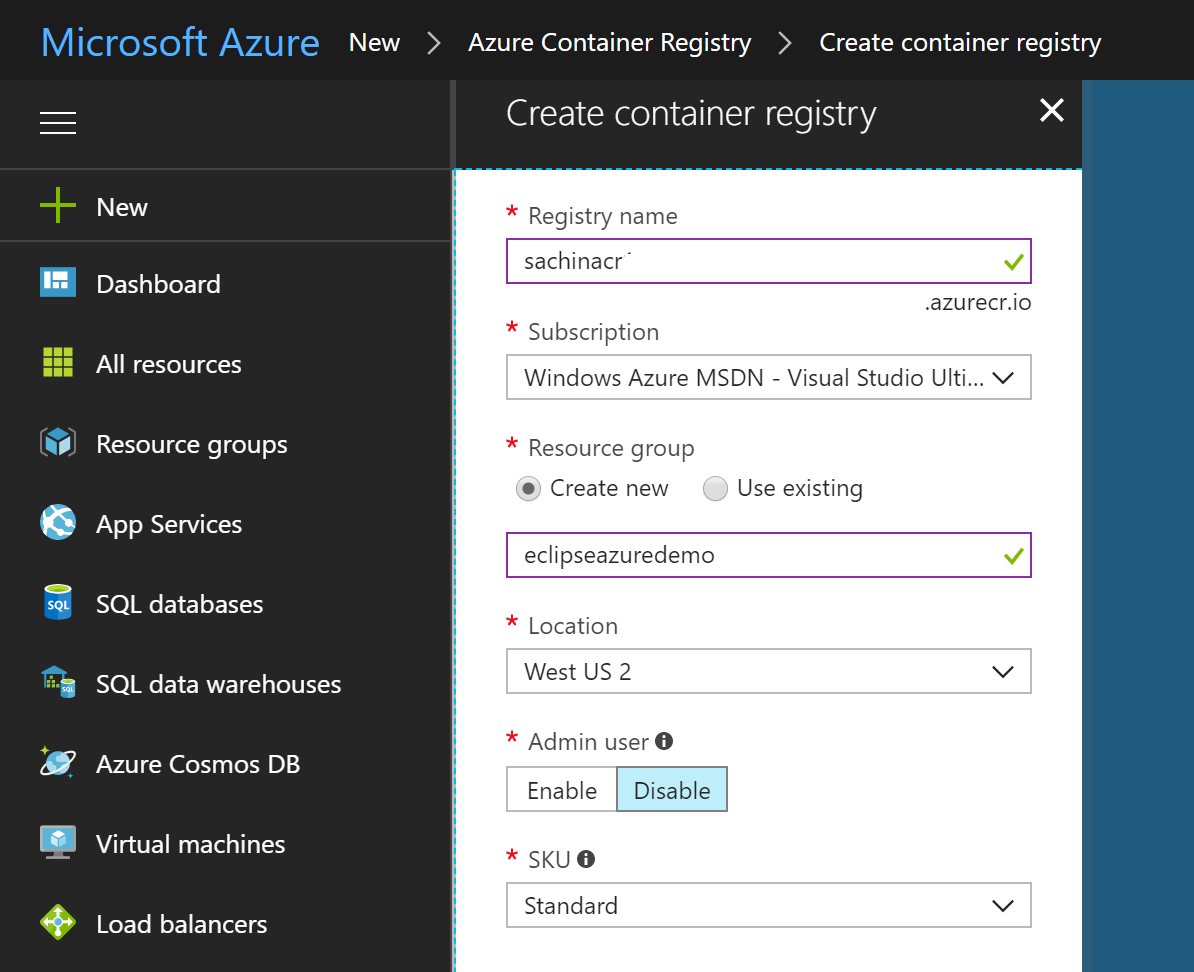
Select +New and search for Azure Container Registry. Select Create. In the Create Container Registry dialog, enter a name for the service, select the resource group, location, Enable Admin User etc., and select Create.
-
Return to VSTS, from the Build hub, select and edit the MyShuttle build. This build definition contains a maven task to build the pom.xml file. The maven task should be updated the following settings
Parameter Value Notes Options -DskipITs --settings ./maven/settings.xmlSkips integration tests during the build Code Coverage Tool JaCoCo Selects JaCoCo as the coverage tool Source Files Directory src/mainSets the source files directory for JaCoCo 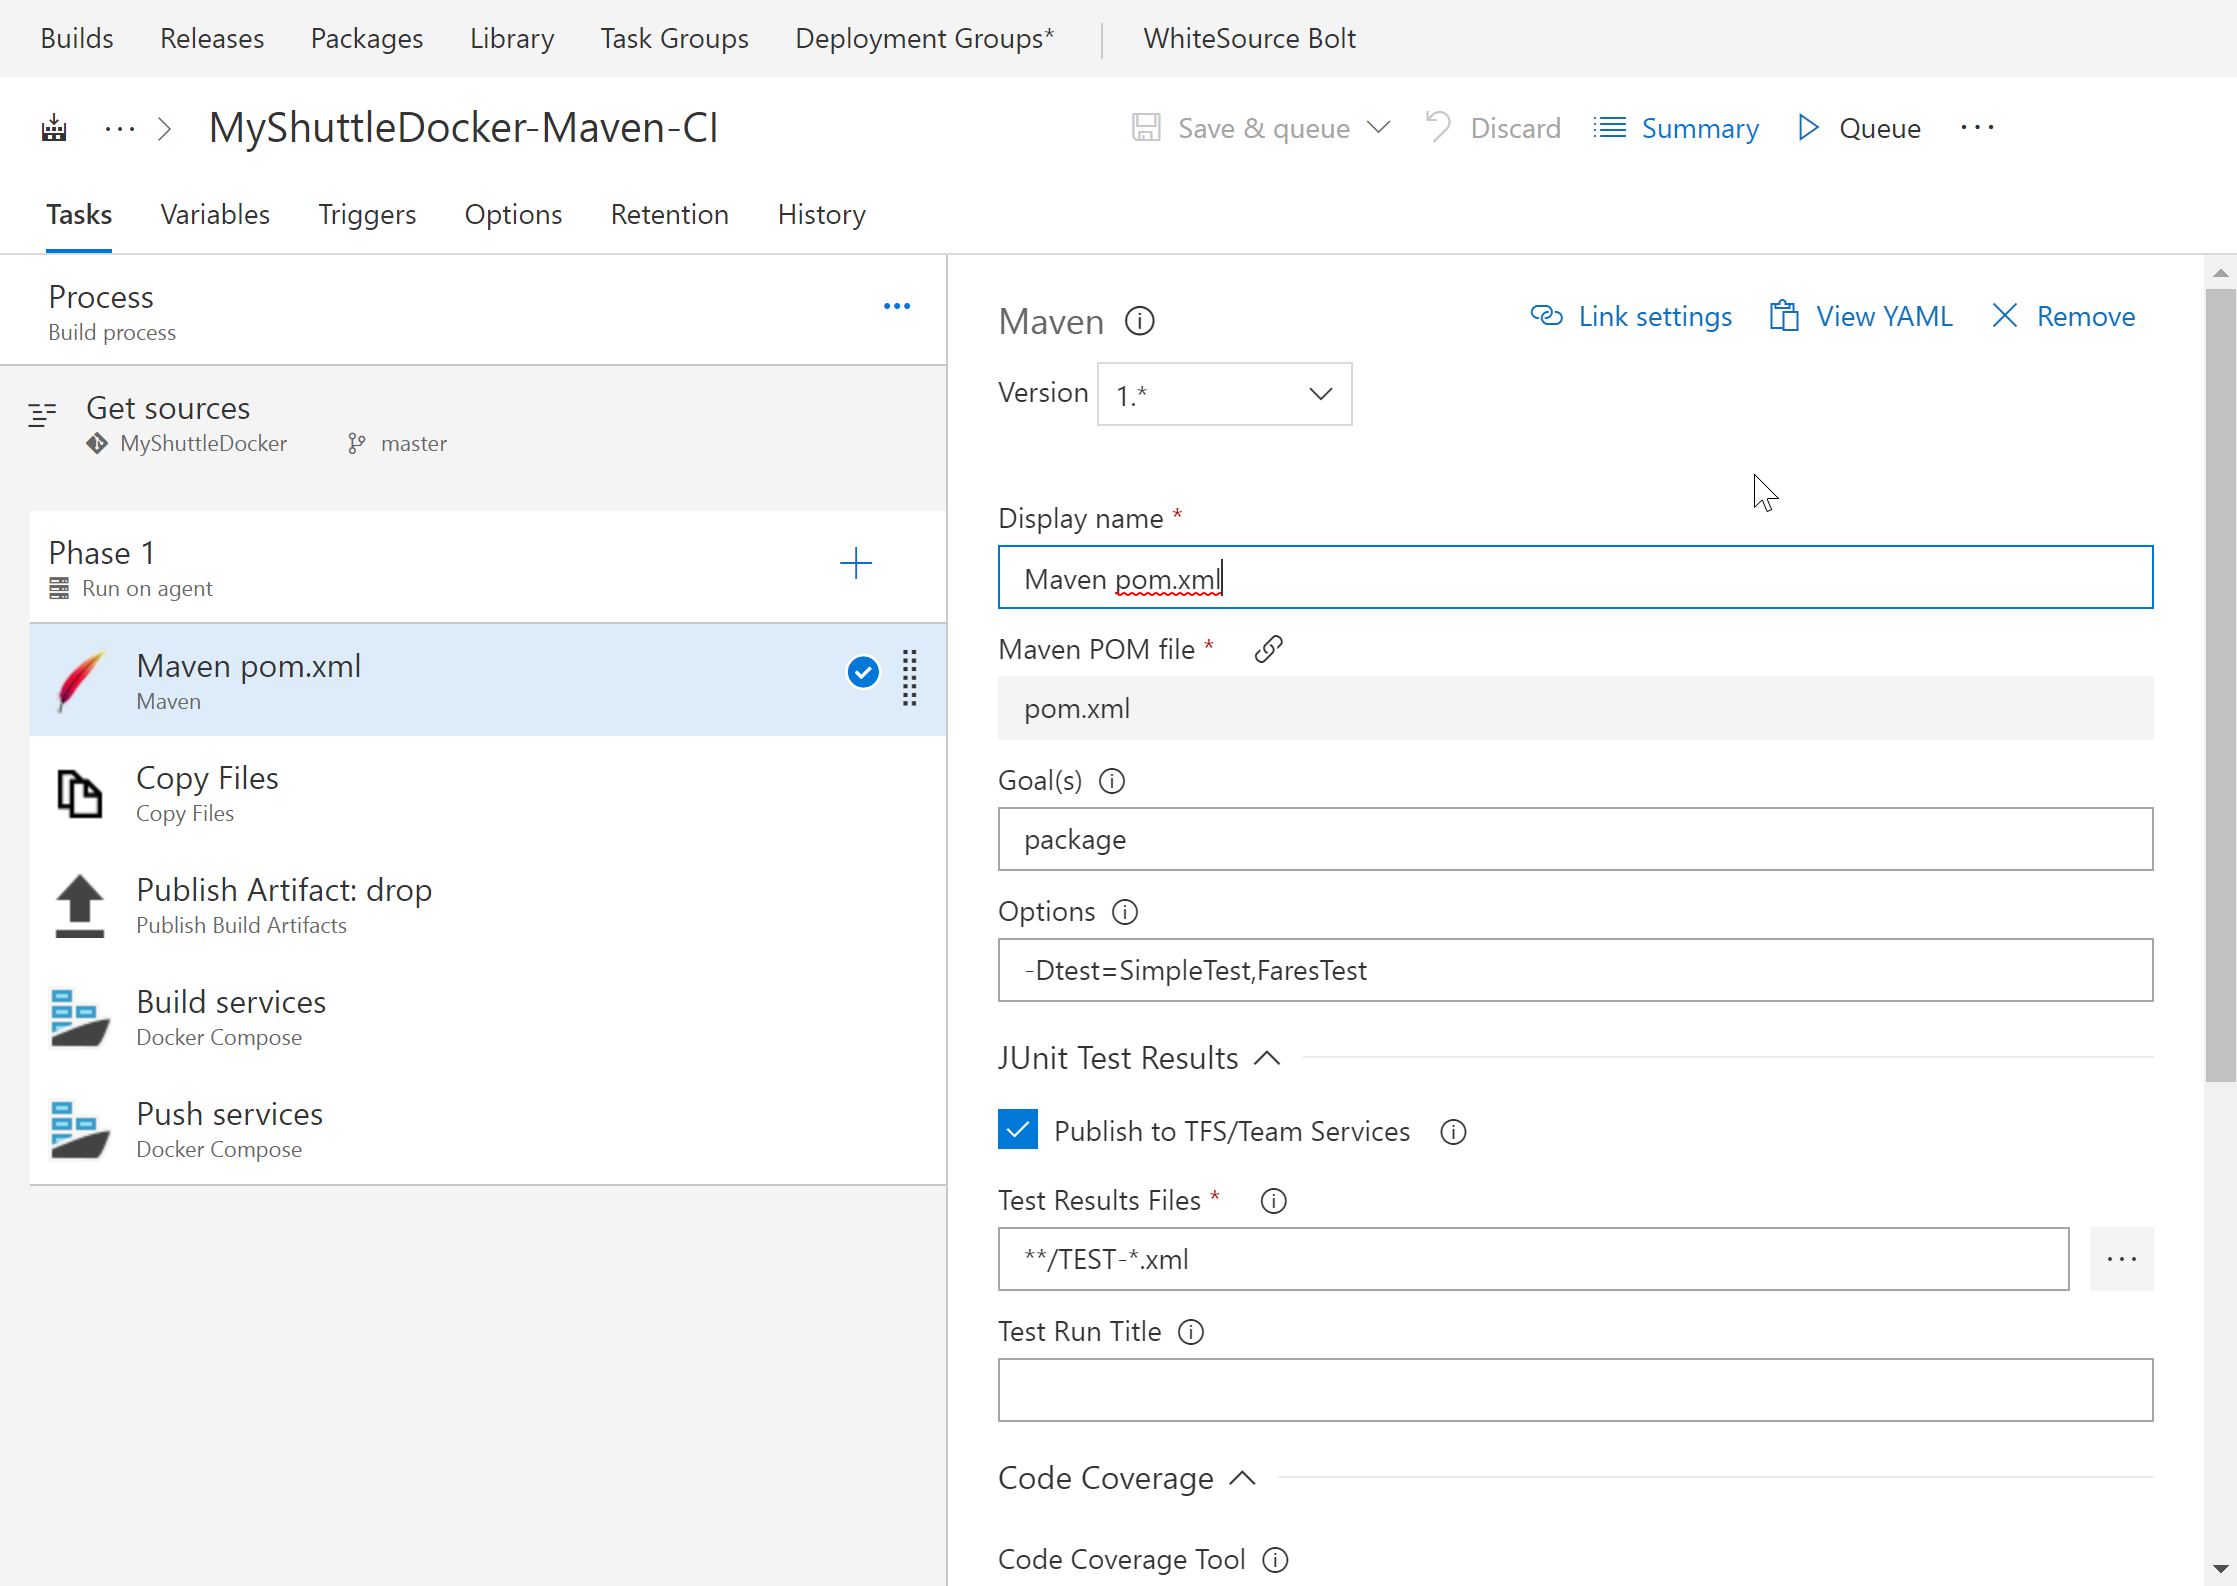
-
Then there is Copy and Publish tasks to copy the artifacts to the staging directory and publish to VSTS (or a file share).
-
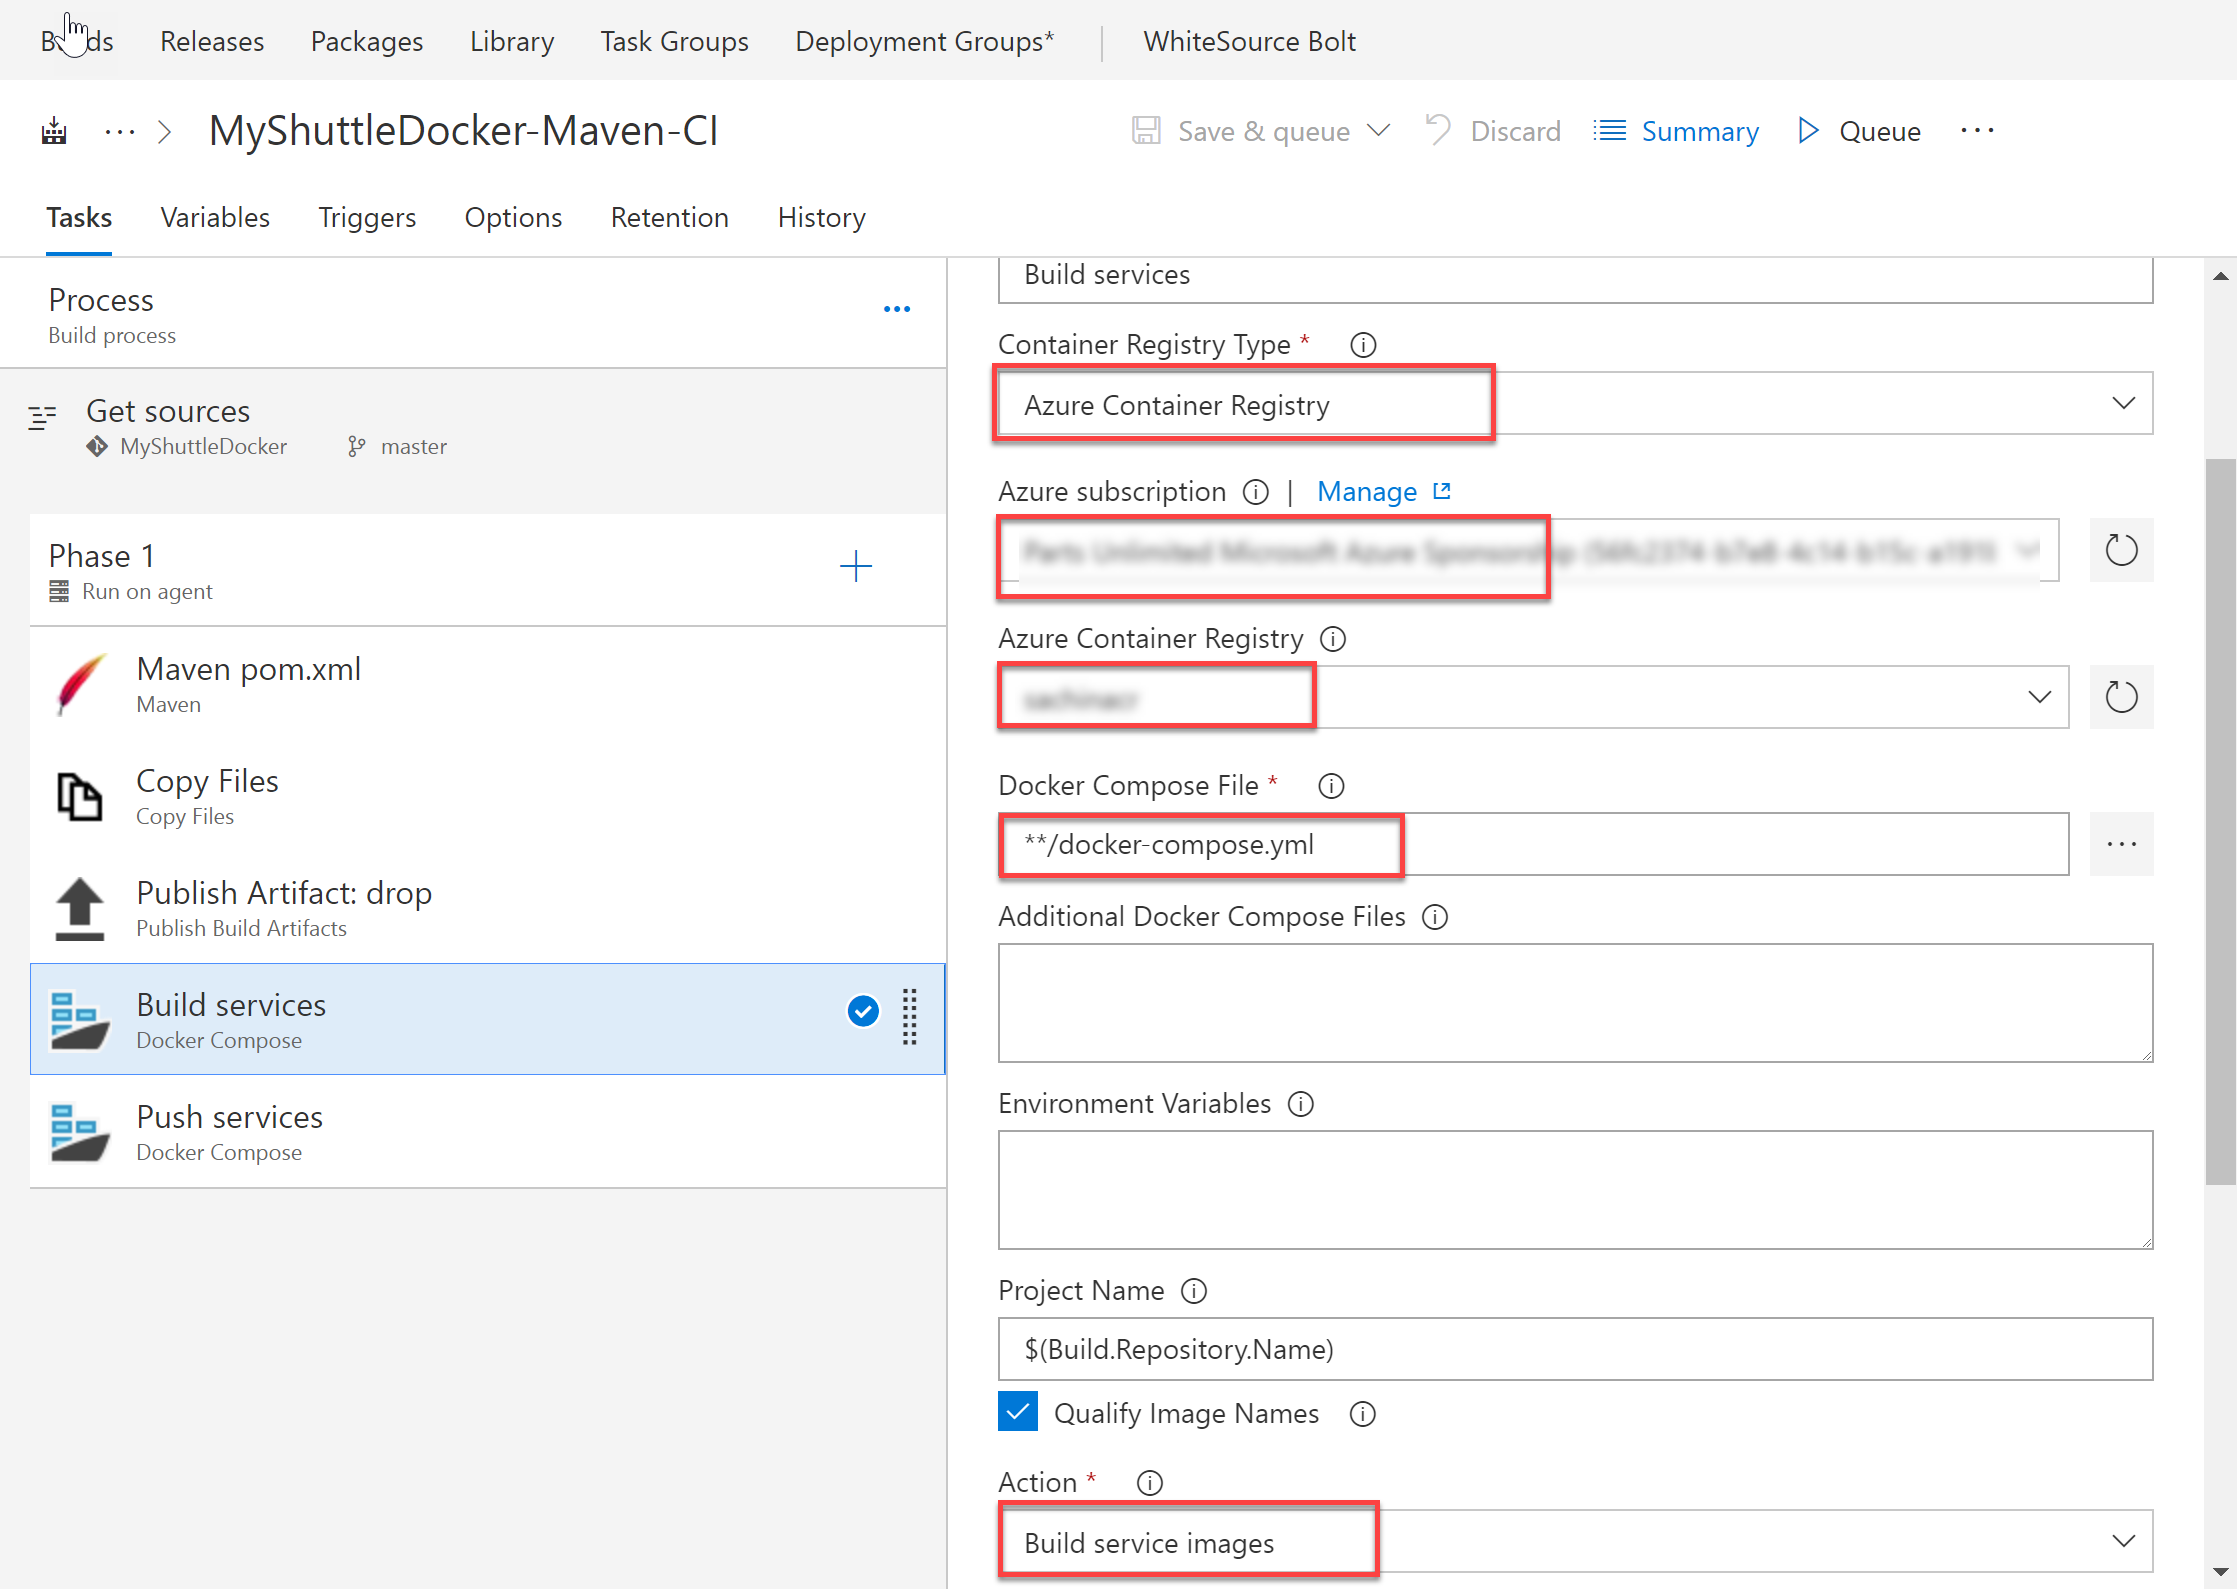
Next we use the Docker Compose task to build and publish the images. Set the Action as Build Service Images. The other settings of the Docker compose tasks are as follows:
Parameter Value Notes Container Registry Type Azure Container Registry This is to connect to the Azure Container Registry you created earlier Azure Subscription Your Azure subscription The subscription that contains your registry Azure Container Registry Your registry Select the Azure Container registry you created earlier Additional Image Tags $(Build.BuildNumber)Sets a unique tag for each instance of the build Include Latest Tag Check (set to true) Adds the latesttag to the images produced by this build -
Add another Docker Compose task with the same settings (you can also clone the previous task). We will just change the Action to Push Images. This action will instruct the task to push the container image to a container registry
-
Click the Save and Queue button to save and queue this build.Make sure you are using the Hosted Linux Agent.
-
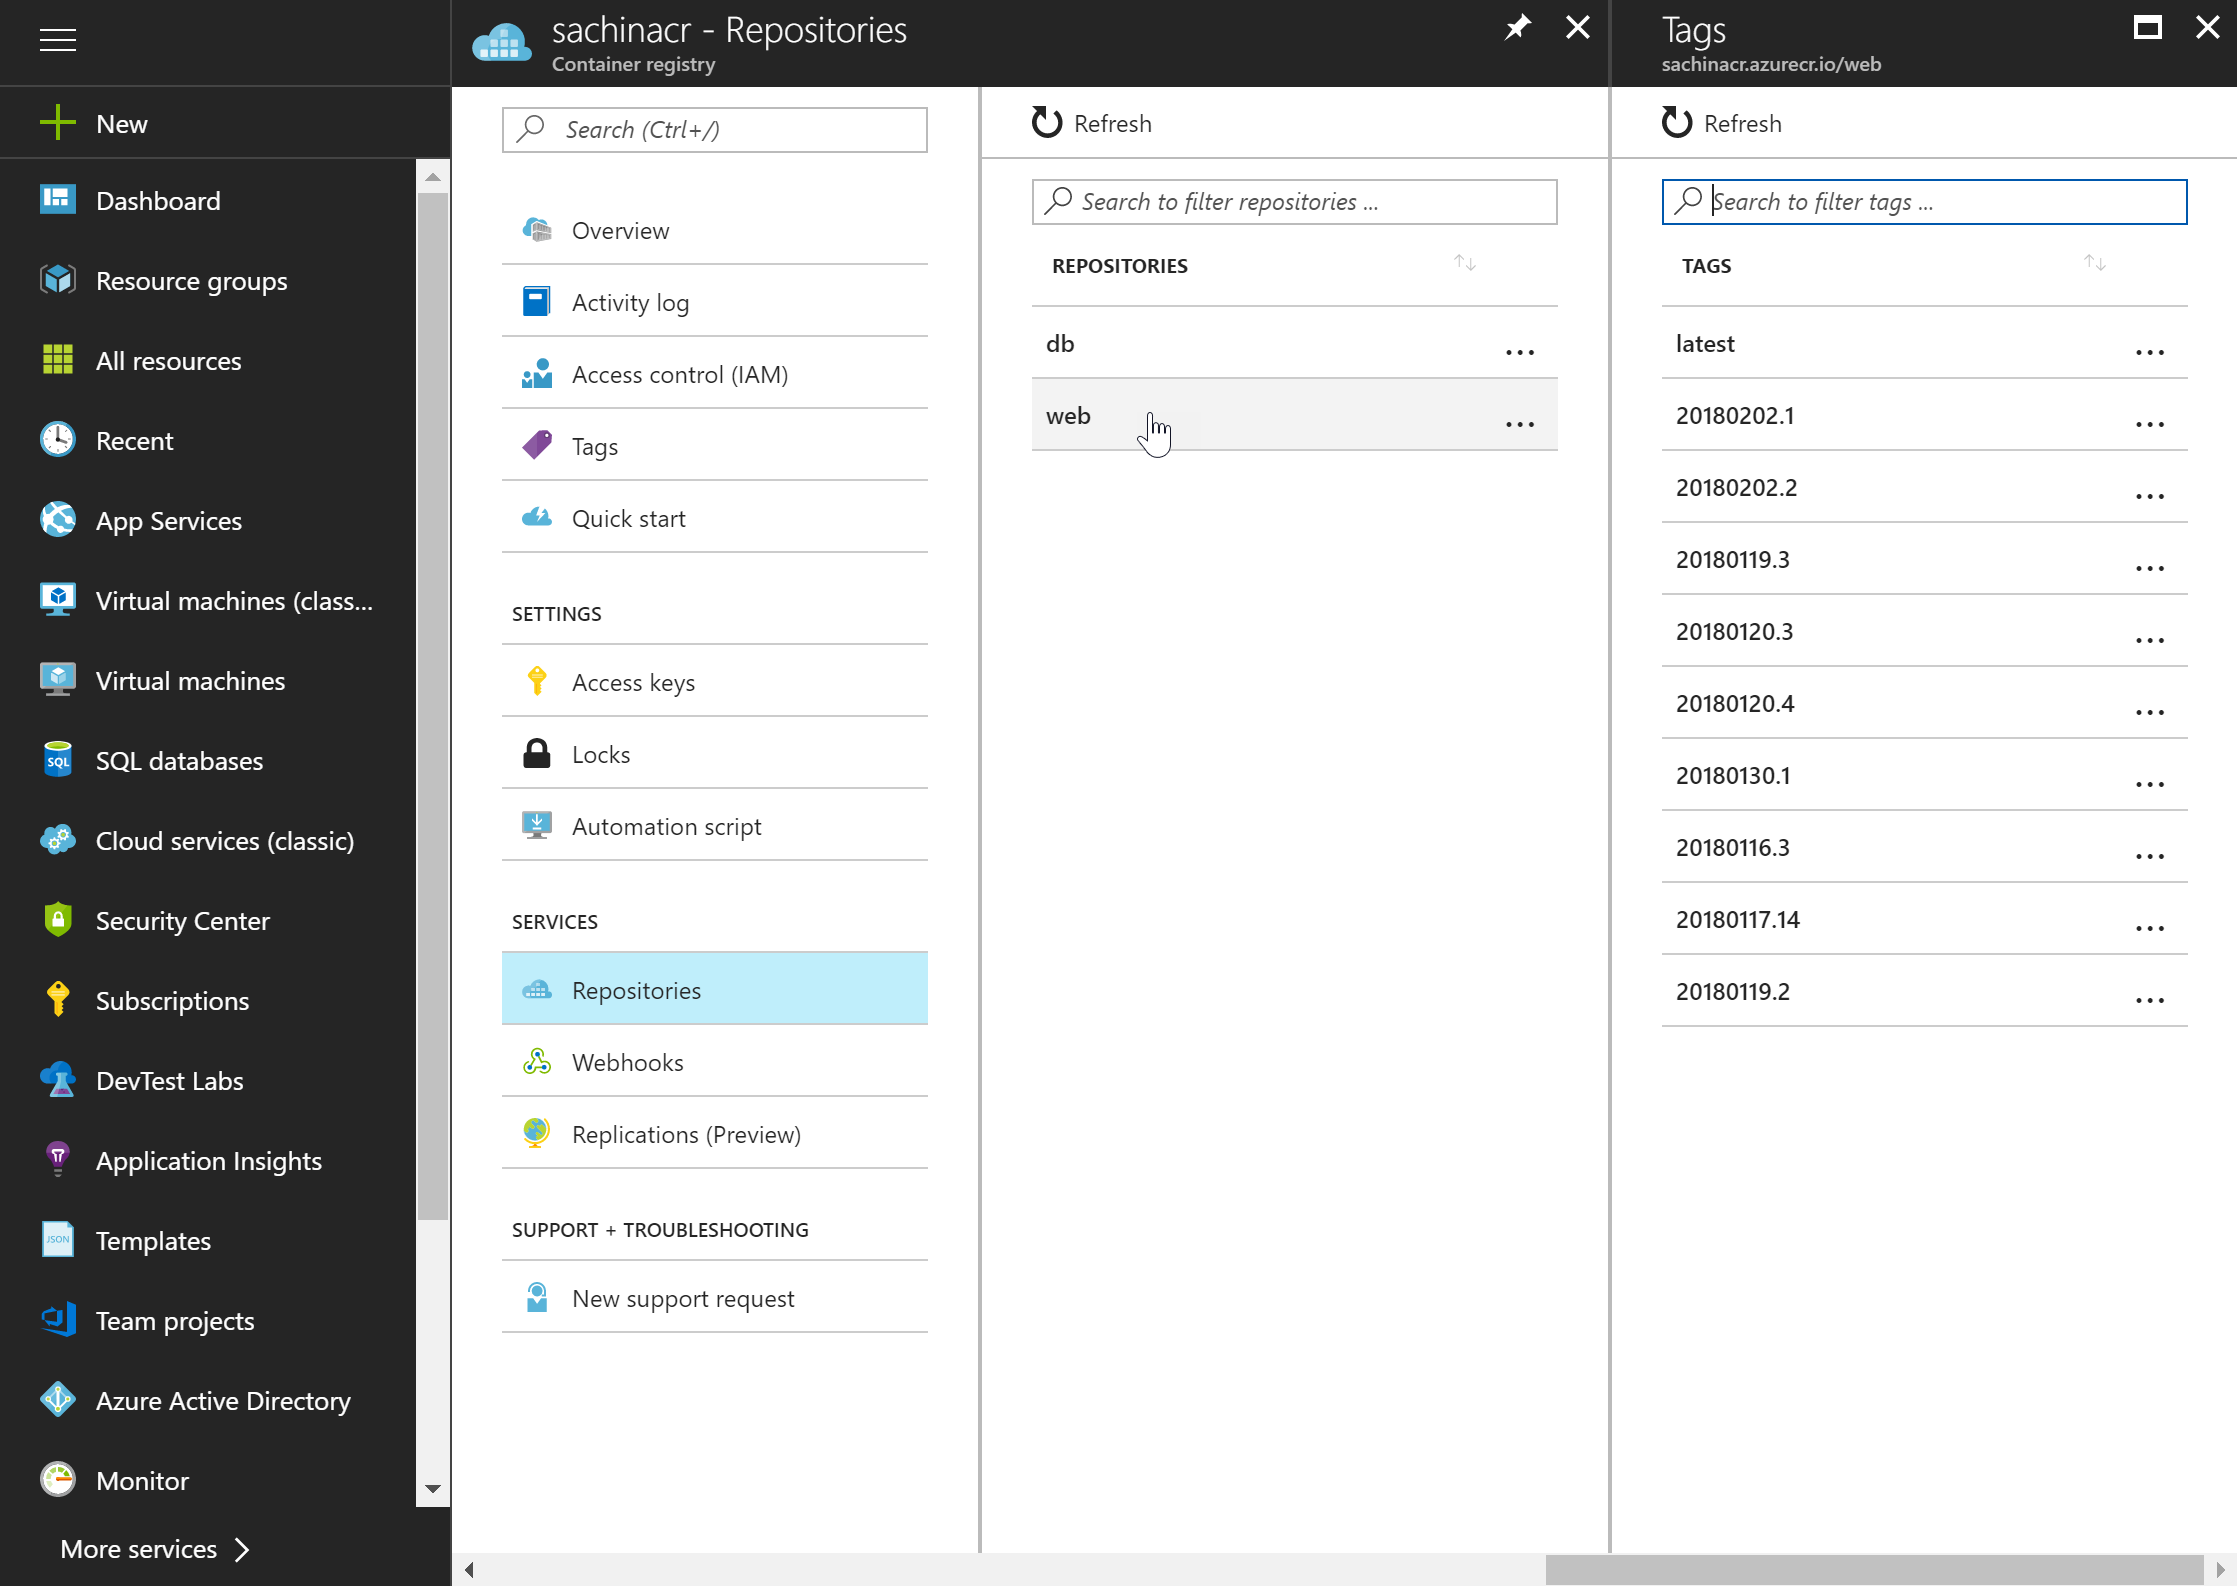
Wait for the build to complete. When it is successful you can go to your Azure portal and verify if the images were pushed successfully.
-
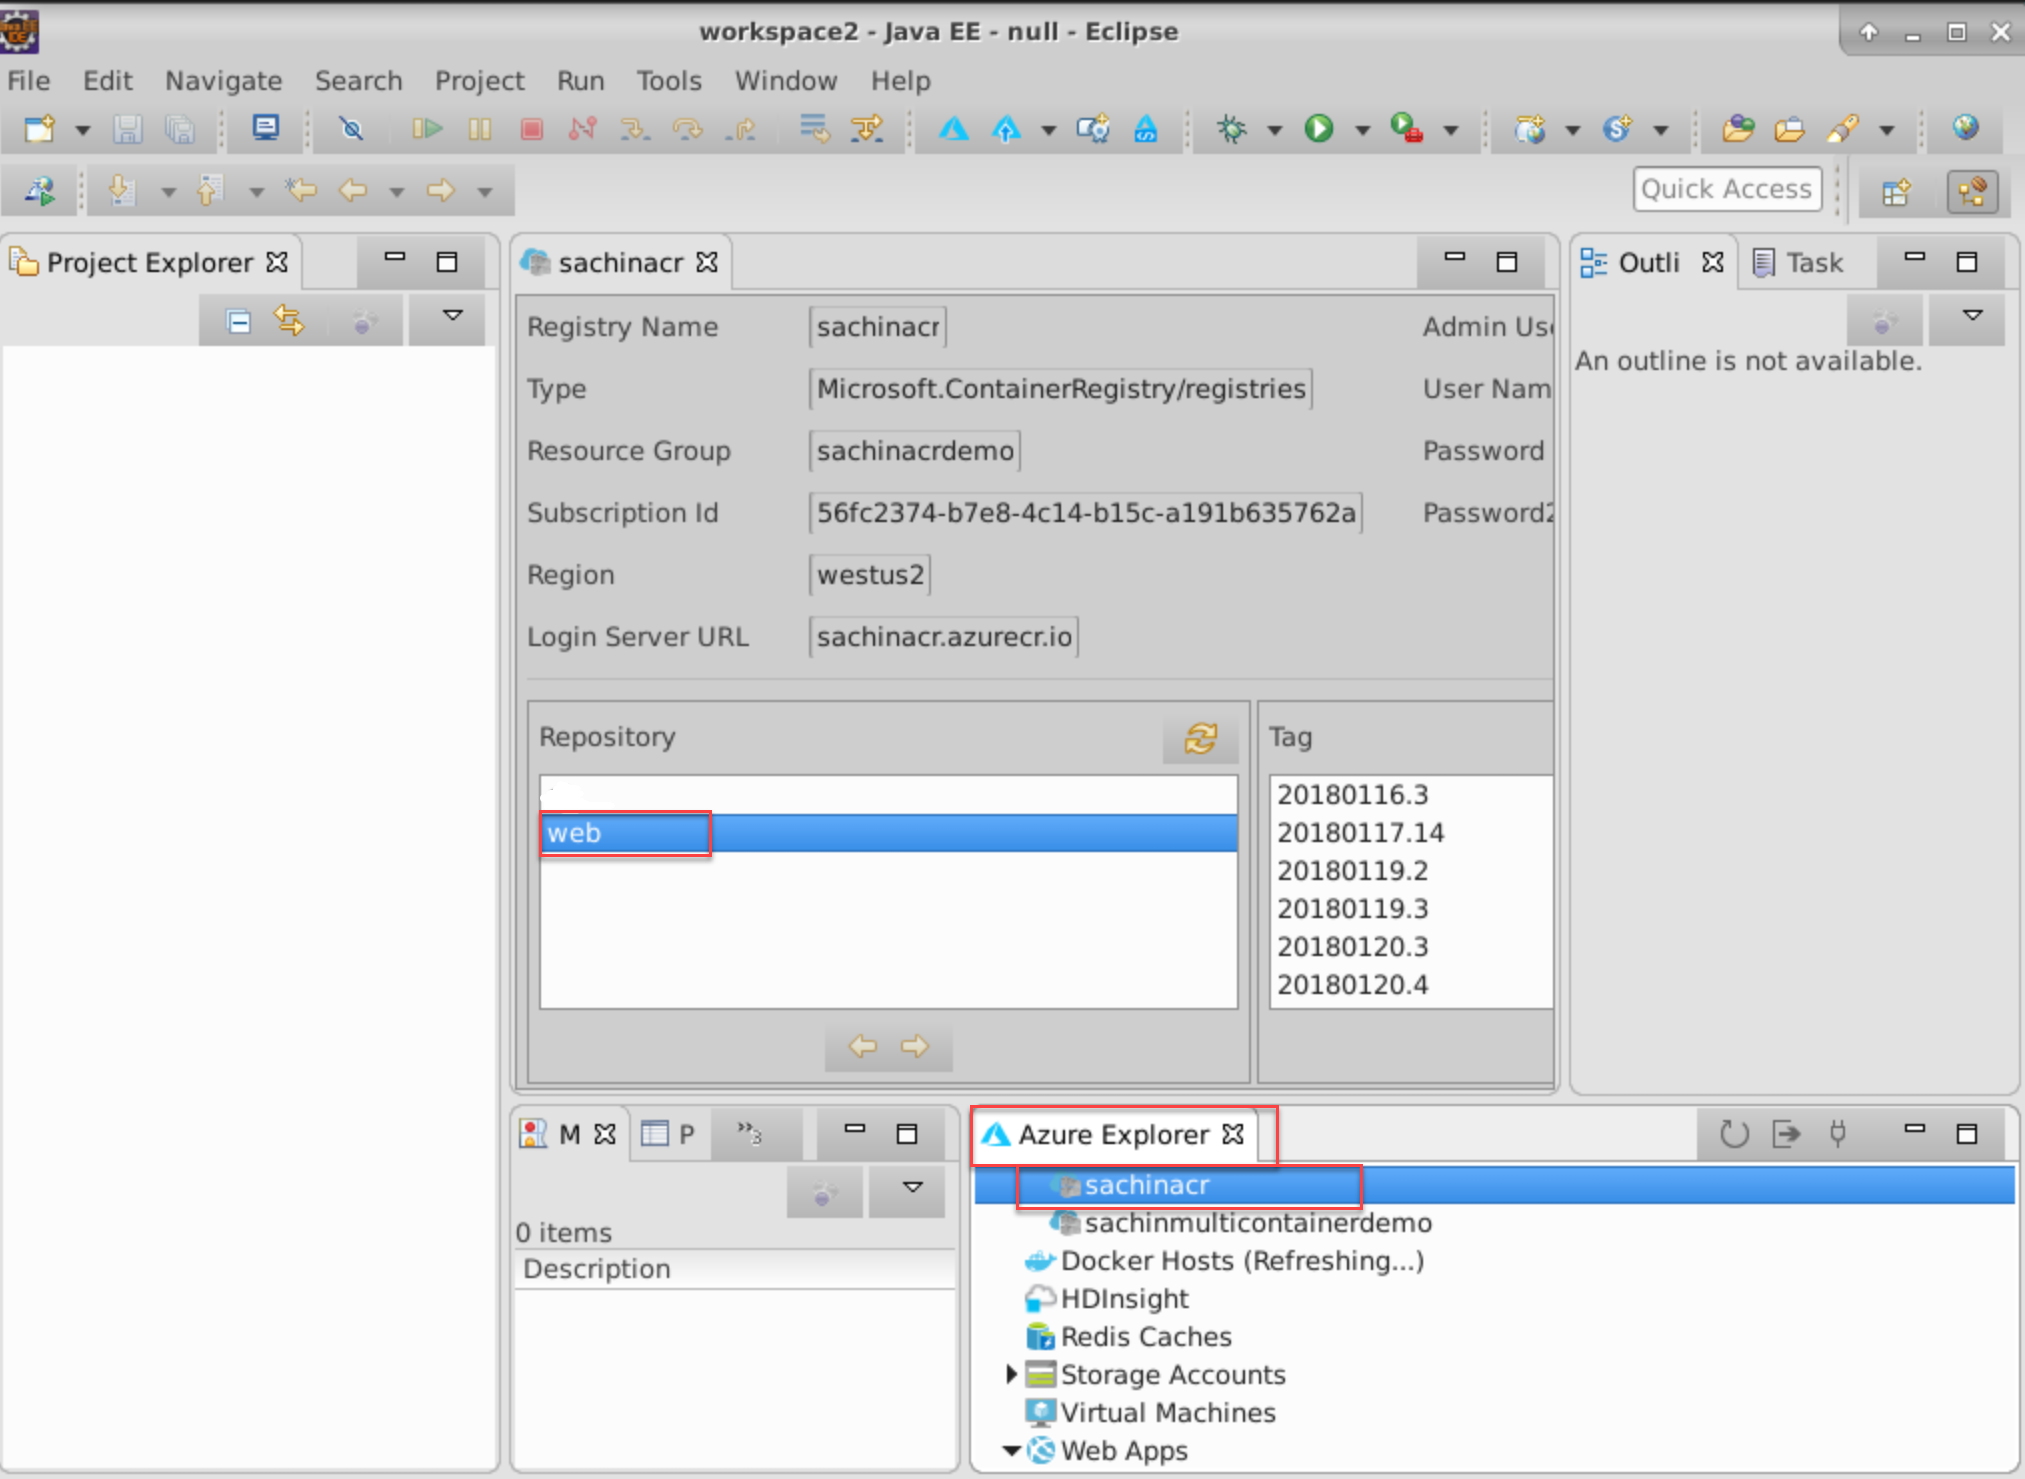
If you are following this from the Eclipse lab, you can also verify if the images were pushed correctly from the Azure Explorer view. Sign in to Azure, refresh Azure Container Registry. Right click and select Explore Container Registry. You should see the image - tagged with the build number.
Exercise 3: Deploying to an Azure Web App for containers
In this exercise, we will setup a CD pipeline to deploy the web application to an Azure web app. First, let’s create the Web App.
-
Sign into your Azure Portal
-
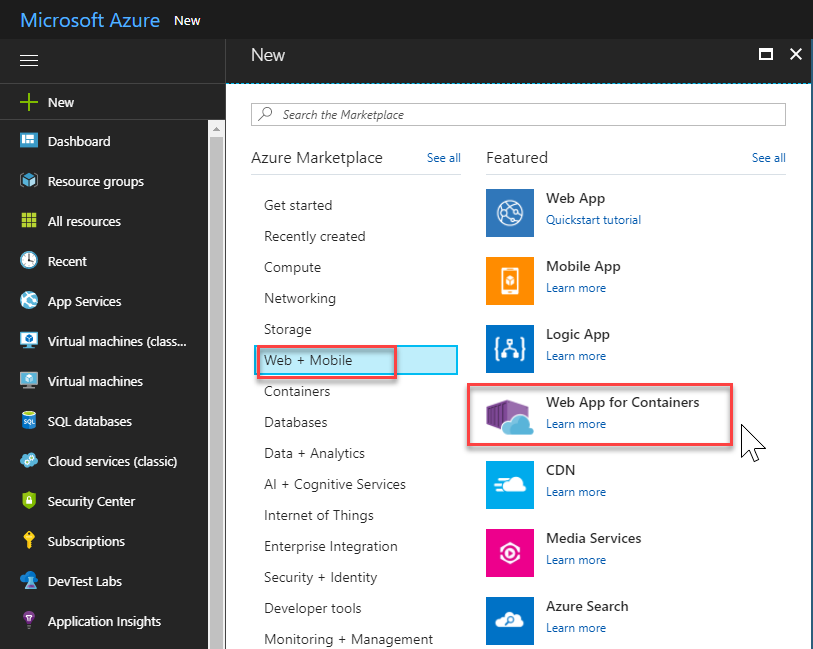
In the Azure Portal, choose New, Web + Mobile and then choose Web App for Containers
-
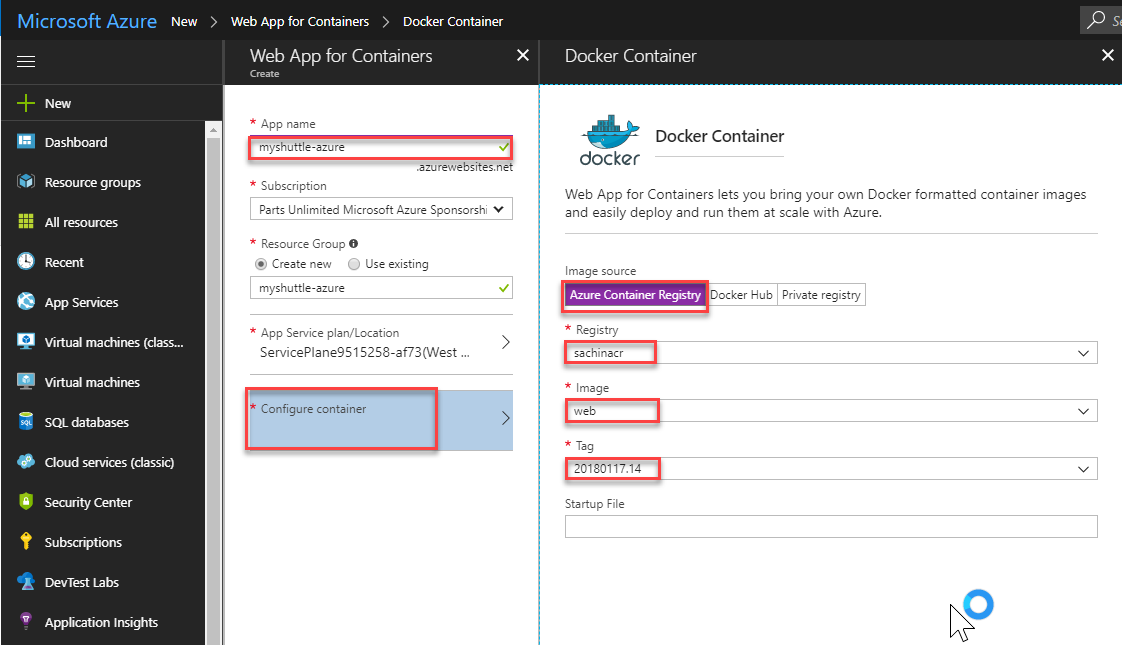
Provide a name for the new web app, select existing or create new resource group for the web app. Then select Configure Container to specify the source repository for the images. Since we are using ACR to store the images, select Azure Container Registry. Select the Registry, Image value as web and Tag with the latest build value from the drop-downs. Select OK and then select Create to start provisioning the web app
-
Once the provisioning is complete, go to the web app properties page, and select the URL to browse the web app. You should see the default Tomcat page
-
Append /myshuttledev the web application context path for the app, to the URL to get to the MyShuttle login page. For example if your web app URL is
https://myshuttle-azure.azurewebsites.net/, then your URL to the login page ishttps://myshuttle-azure.azurewebsites.net/myshuttledev/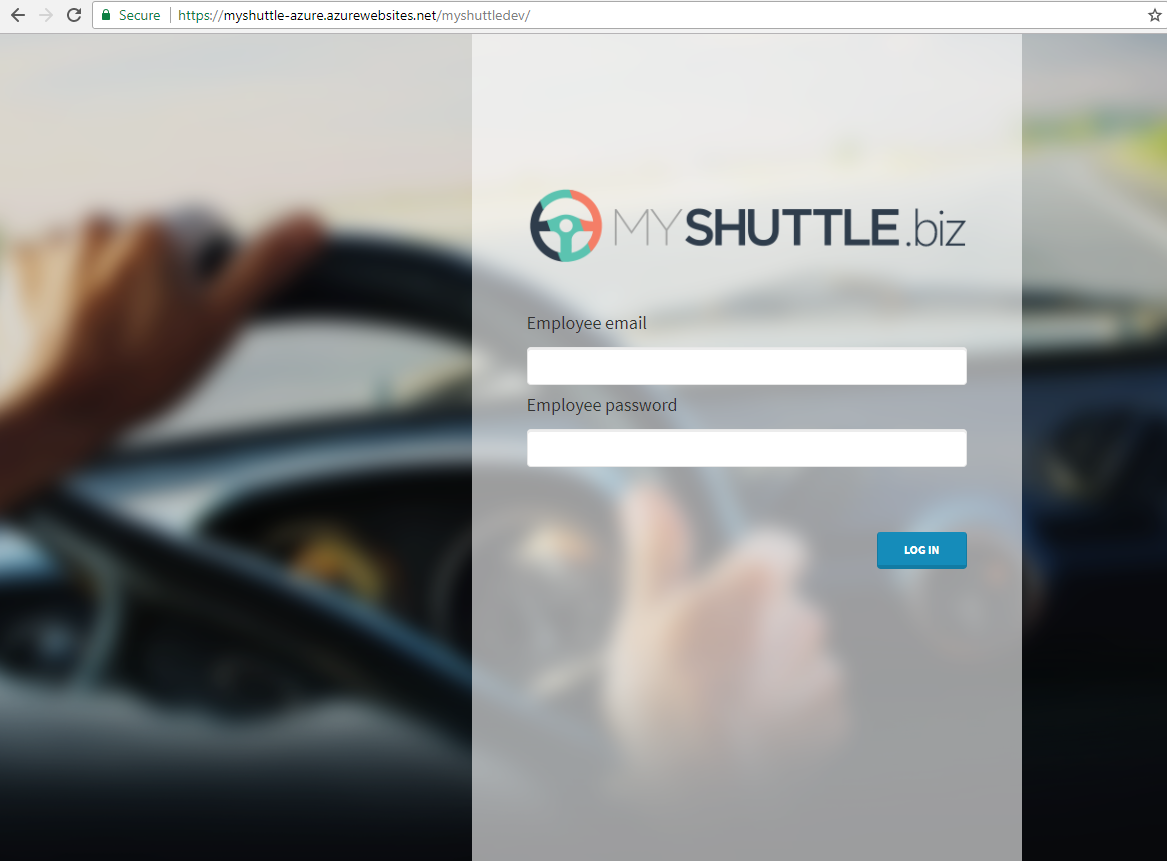
We could configure Continuous Deployment to deploy the web app is updated when a new image is pushed to the registry, within the Azure portal itself. However, setting up a VSTS CD pipeline will provide more flexibility and additional controls (approvals, release gates, etc.) for application deployment
-
Back in VSTS, select Releases from the Build and Release hub. Select + and then Create Release Definition
-
Select the Azure App Service Deployment template and click Apply
-
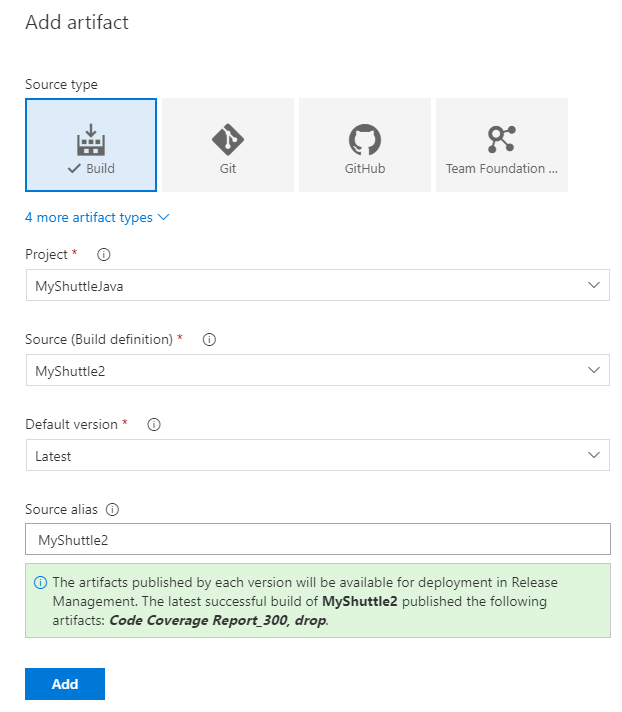
Select Pipeline. Click +Add to add the artifacts. Select Build for the source type. Select the Project, Source and the Default version. Finally select Add to save the settings
-
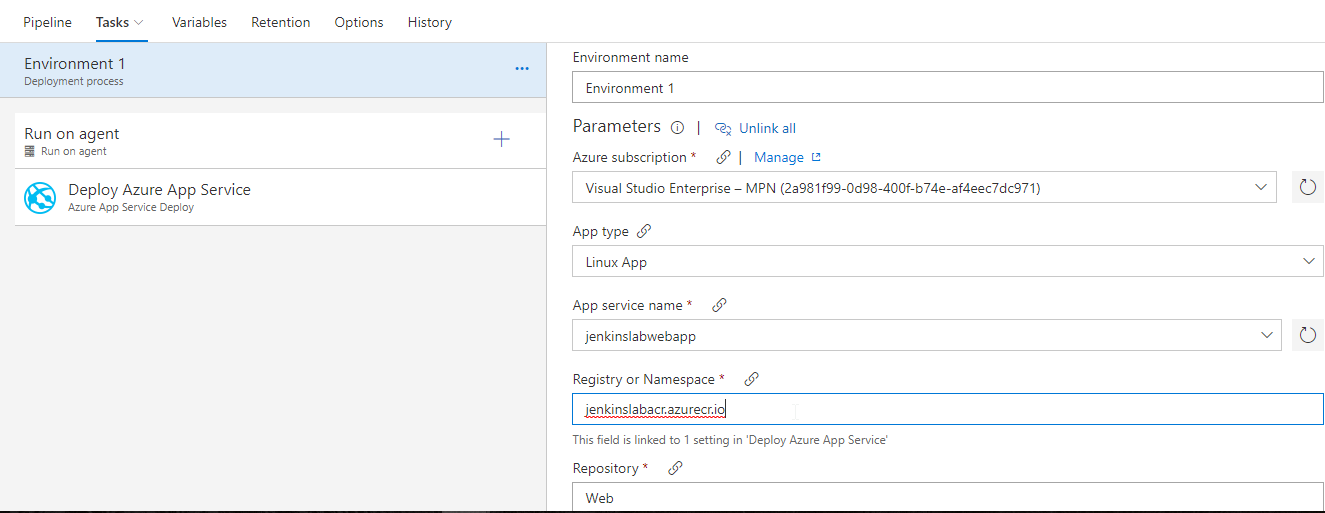
Open the environment. Select Environment 1 and configure as follows
- Pick the Azure subscription
- Select Linux App for the App Type
- Enter the App Service name that you created
- Enter the Azure Container Registry server url for Registry or Namespace and then
- Enter Web for the Repository
-
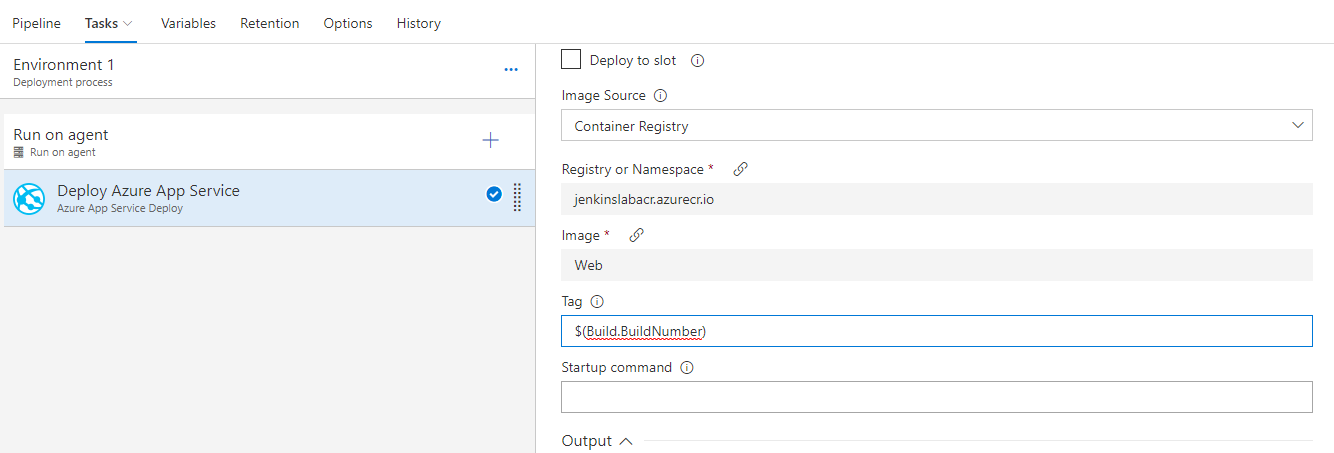
Select the Deploy Azure App Service task and make sure that these settings are reflected correctly. Note that the task allows you to specify the Tag that you want to pull. This will allow you to achieve end-to-end traceability from code to deployment by using a build-specific tag for each deployment. For example, with the Docker build tasks you can tag your images with the Build.ID for each deployment.
-
Select Save and then click + Release | Create Release to start a new release
-
Check the artifact version you want to use and then select Create
-
Wait for the release is complete and then navigate to the URL
http://{your web app name}.azurewebsites.net/myshuttledev. You should be able to see the login page
Setting up MySQL database
Next, let’s set up the MySQL database for the application
-
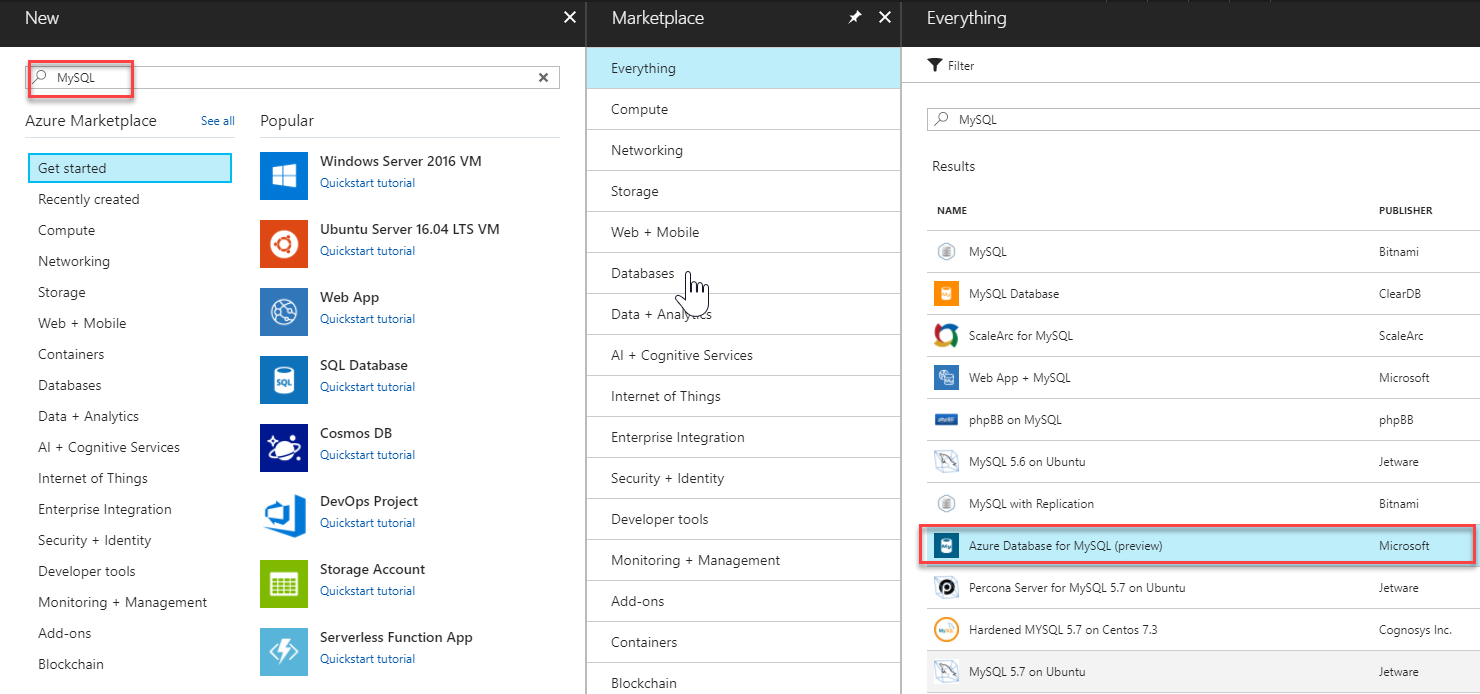
From the Azure portal, select + New and search for MySQL. Choose Azure Database for MySQL(preview) from the filtered result list and click Create.
-
Enter all required information and select Create

-
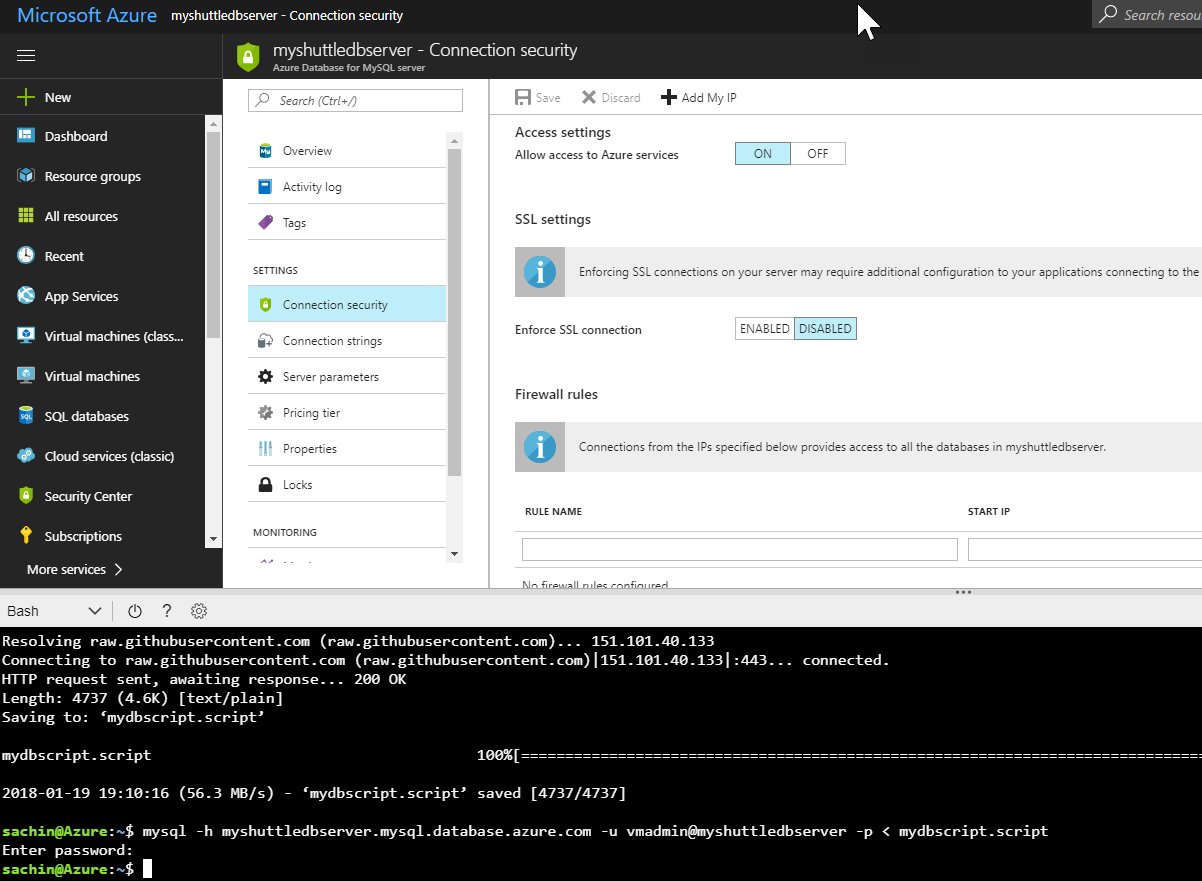
Navigate to Connection Security section, enable Allow Access to Azure Services and click Save. Select Properties. Note down SERVER NAME and SERVER ADMIN LOGIN NAME
-
In this example, the server name is myshuttle-1-mysqldbserver.mysql.database.azure.com and the admin user name is mysqldbuser@myshuttle-1-mysqldbserver
-
We will use the MySQL command-line tool to establish a connection to the Azure Database for MySQL server. We will run the MySQL command-line tool from the Azure Cloud Shell in the browser. To launch the Azure Cloud Shell, click the
>_icon in the top right toolbar and choose Bash if given an option to choose the shell type. -
Enter the following command
wget https://raw.githubusercontent.com/hsachinraj/azure-arm-templates/master/vstsazurejl_arm/mydbscript.scriptThis should download the file that we want to execute on the server
- Next, we will execute the SQL from the downloaded file on the database server. Enter the following command
mysql -h myshuttle-1-mysqldbserver.mysql.database.azure.com -u mysqldbuser@myshuttle-1-mysqldbserver -p < mydbscript.scriptEnter the password that you specified during provisioning the database
This should create the database, tables and populate records for us.
-
Next, navigate to the Web app that you have created. Click Application Settings and scroll down to the Connection Strings section
-
Add a new MySQL connection string with MyShuttleDb as the name and the following string for the value -
jdbc:mysql://{MySQL Server Name}:3306/alm?useSSL=true&requireSSL=false&autoReconnect=true&user={your user name}&password={your password} -
Click Save to save the connection string
Note: Connection Strings configured here will be available as environment variables, prefixed with connection type for Java apps (also for PHP, Python and Node apps). In theDataAccess.javafile undersrc/main/java/com/microsoft/examplefolder, we retrieve the connection string using the following codeString conStr = System.getenv("MYSQLCONNSTR_MyShuttleDb");
You have now setup and configured the database needed to deploy and run the MyShuttle application.
-
You should be able to login to the application now. Return back to the login page and try logging is using any of the username/password combination:
- fred/fredpassword
- wilma/wilmapassword
- betty/bettypassword